Chevrolet Sonic Repair Manual: Air Conditioning Compressor and Condenser Hose Replacement (LUV)
- Removal Procedure
-
- Recover the refrigerant. Refer to Refrigerant Recovery and Recharging.
- Remove the drivetrain and front suspension frame skid plate if equipped. Refer to Drivetrain and Front Suspension Frame Skid Plate Replacement.
- Remove the front fascia assembly. Refer to Front Bumper Fascia Replacement.
- Disconnect the A/C refrigerant pressure sensor electrical connector.
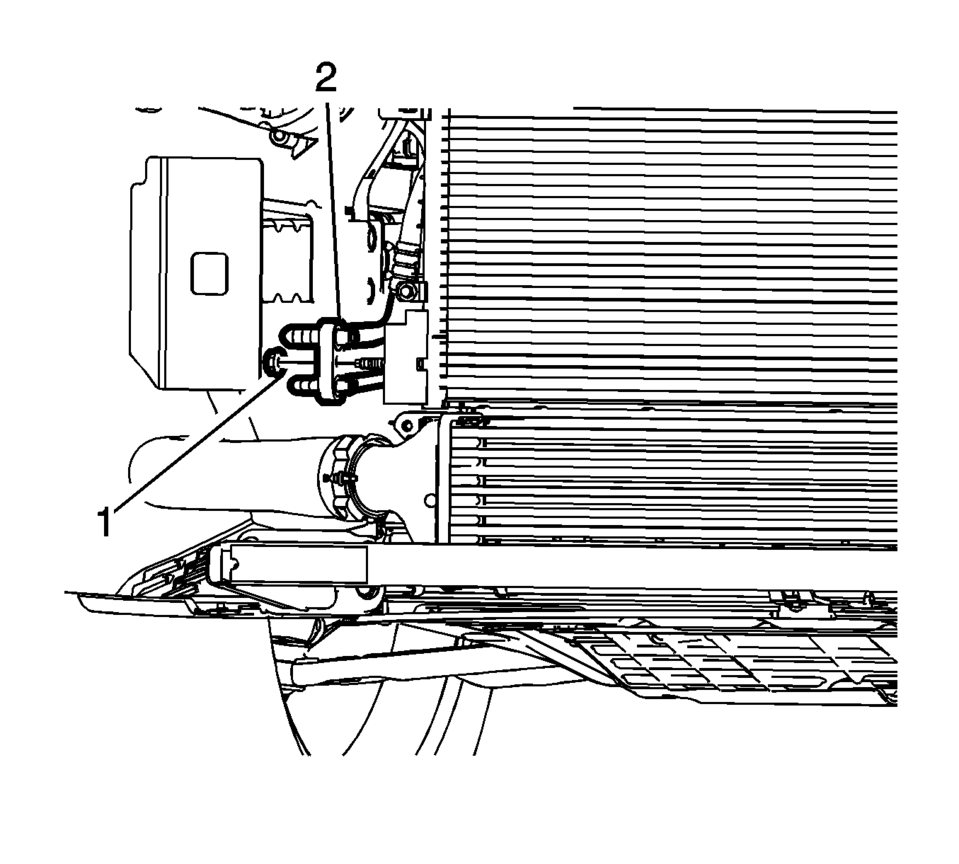
- Remove air conditioning compressor and condenser hose nut (1).
- Remove air conditioning compressor and condenser hose (2) from A/C condenser.
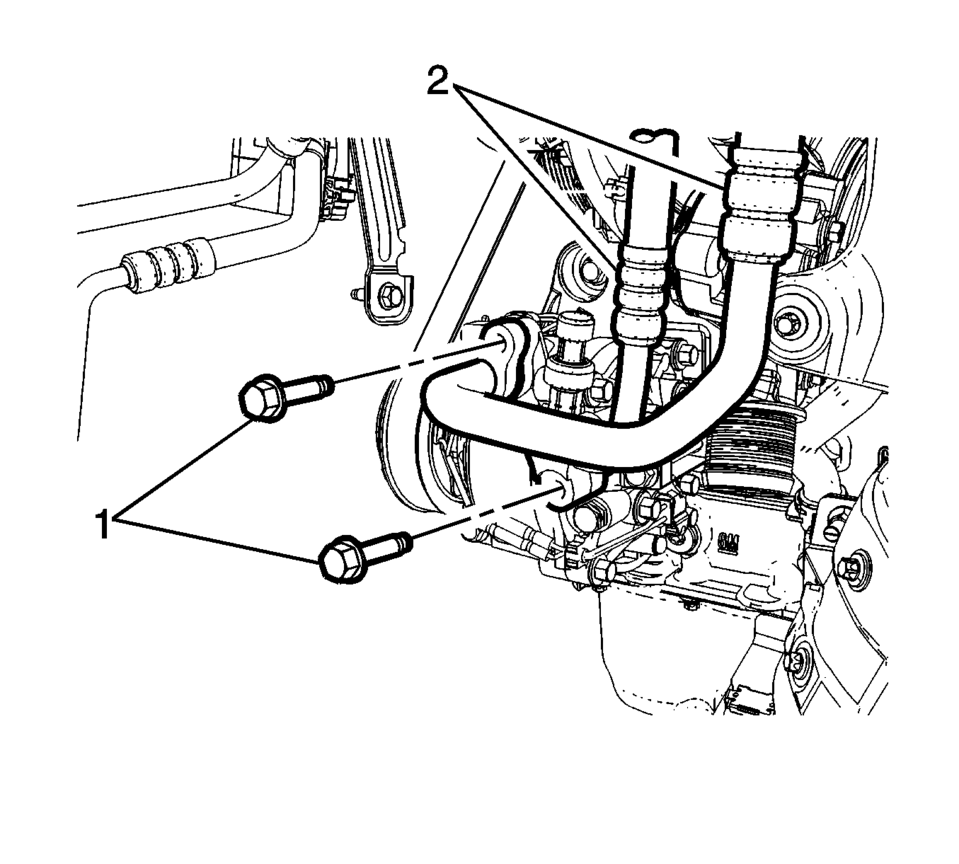
- Remove A/C compressor and condenser hose bolts (1).
- Remove A/C compressor and condenser hose (2) from A/C compressor.
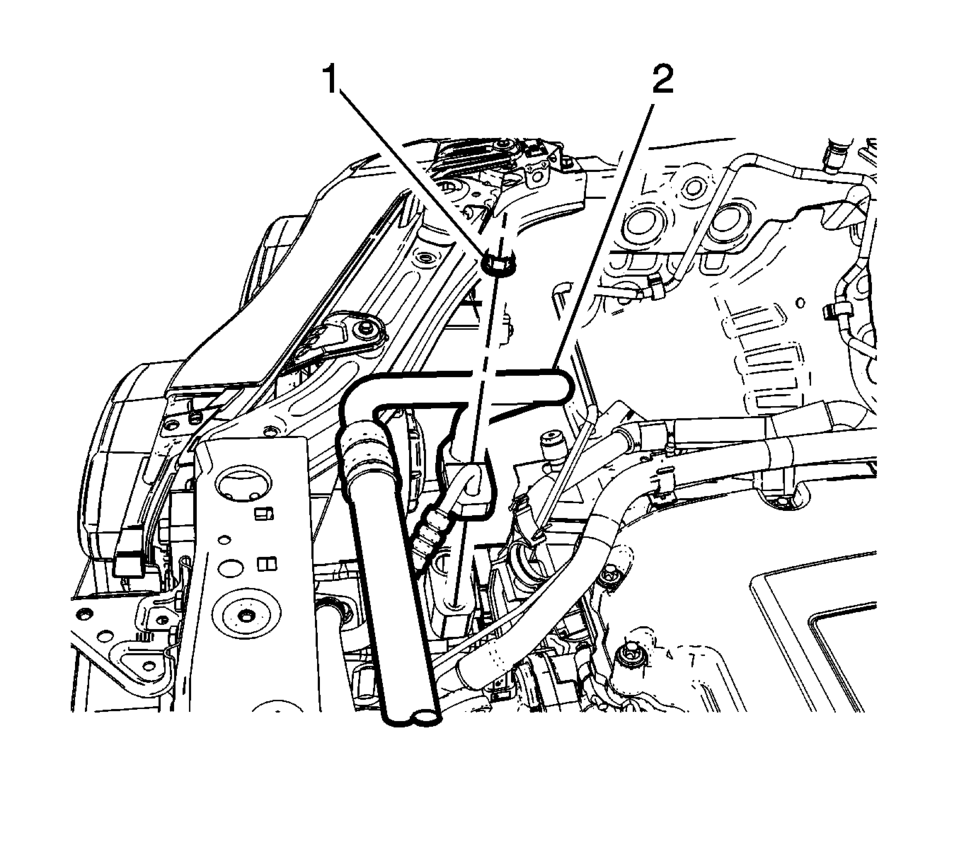
- Remove air conditioning compressor and condenser hose nut (1).
- Remove air conditioning compressor and condenser hose (2) from refrigerant hose.
- Remove air conditioning compressor and condenser hose from the vehicle.
- Discard all the old air conditioning seals.
- Transfer the air conditioning pressure sensor to the new line assembly.
_. i/v
- Installation Procedure
-
- Install NEW air conditioning system seals. Refer to Air Conditioning System Seal Replacement.
- Install air conditioning compressor and condenser hose assembly into the vehicle.
- Install air conditioning compressor and condenser hose (2) to the refrigerant hose.
- Install air conditioning compressor and condenser hose nut (1) and tighten
the nut to 22 Y (16 lb ft)
.
- Install air conditioning compressor and condenser hose (2) to the A/C compressor.
- Install air conditioning compressor and condenser hose bolts (1) and
tighten the bolt to 22 Y (16 lb ft)
.
- Install air conditioning compressor and condenser hose (2) to the A/C condenser.
- Install air conditioning compressor and condenser hose nut (1) and tighten
the nut to 22 Y (16 lb ft)
.
- Connect the A/C refrigerant pressure sensor electrical connector.
- Install the front fascia assembly. Refer to Front Bumper Fascia Replacement.
- Install the drivetrain and front suspension frame skid plate if equipped. Refer to Drivetrain and Front Suspension Frame Skid Plate Replacement.
- Charge the refrigerant system. Refer to Refrigerant Recovery and Recharging.
_. i/v
Caution:
Refer to Fastener Caution.
 Air Conditioning Compressor and Condenser Hose Replacement (LDE/LWE)
Removal Procedure
Recover the refrigerant. Refer to Refrigerant Recovery and Recharging.
Disconnect the A/C refrigerant pressure sensor electrical connector.
Remove air ...
 Air Conditioning Compressor and Condenser Hose Replacement (LUW)
Removal Procedure
Recover the refrigerant. Refer to Refrigerant Recovery and Recharging.
Disconnect the A/C refrigerant pressure sensor electrical connector.
Remove ...
Other materials:
Special Tools
Illustration
Tool Number/Description
EL–50334–20
Multi-Media Interface Tester (MIT)
EL–50334–50
USB Cable and Adapter Kit
EL-48028
Digital Radio Test ...
Wheel Alignment Measurement
Steering and vibration complaints are not always the result of improper alignment.
One possible cause is wheel and tire imbalance. Another possibility is tire lead
due to worn or improperly manufactured tires. Lead/pull is defined as follows: At
a constant highway speed on a typical straight r ...
Spark Plug Replacement
Spark Plug Replacement
Callout
Component Name
Preliminary Procedure
Open the hood.
Remove the engine sight shield.
Remove the ignition coil. Refer to Ignition Coil Replacement.
1
Spark P ...

0.0063