Chevrolet Sonic Repair Manual: Camshaft Timing Chain Replacement
Special Tools
EN-955 Locking Pin
For equivalent regional tools. Refer to Special Tools.
- Removal Procedure
-
- Remove the engine front cover. Refer to Engine Front Cover with Oil Pump Replacement.
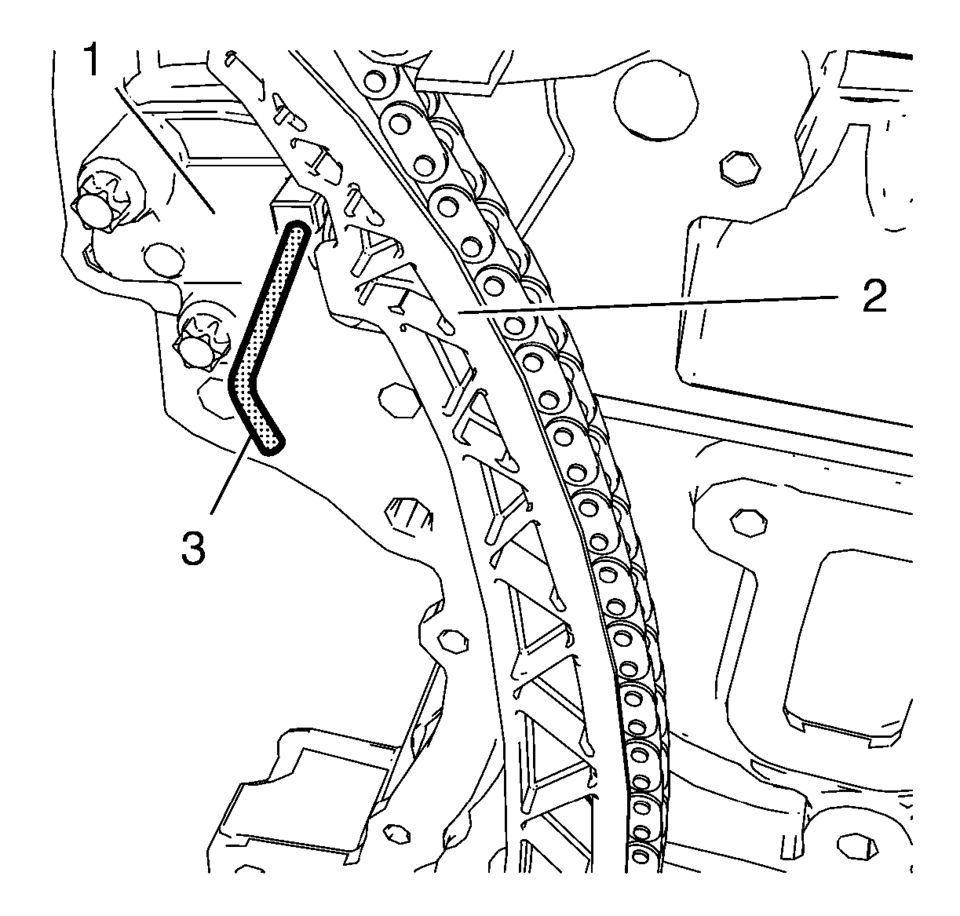
- Push the timing chain (2) in direction to the timing chain tensioner (1) and install the EN-955 pin (3).
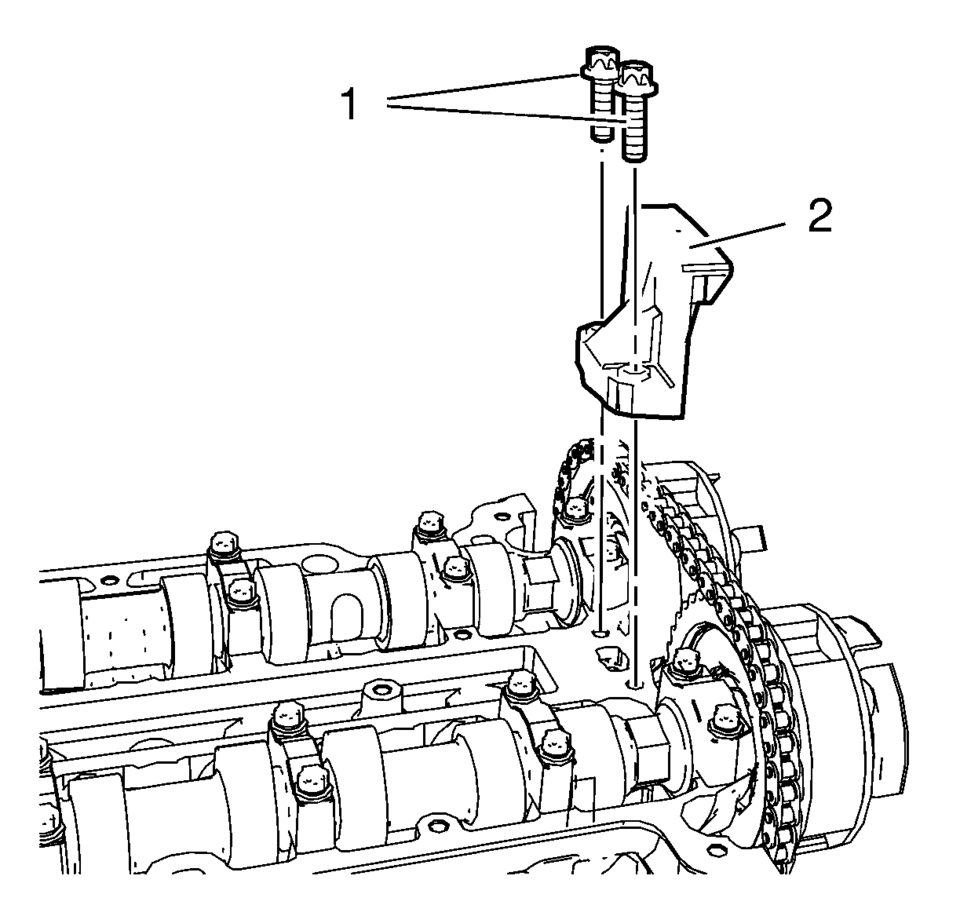
- Remove the two upper timing chain guide bolts (1).
- Remove the upper timing chain guide (2).
- Remove the two timing chain guide right side bolts (2).
- Remove the timing chain guide right side (1).
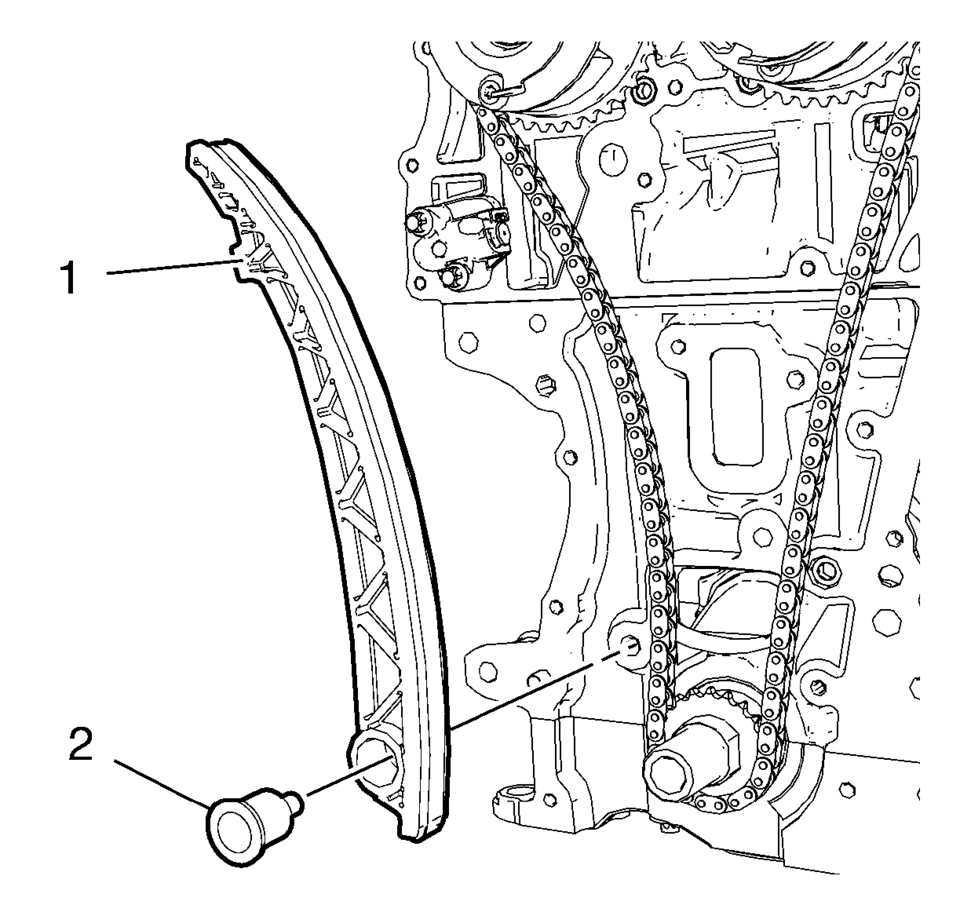
- Remove the timing chain tensioner shoe bolt (2).
- Remove the timing chain tensioner shoe (1).
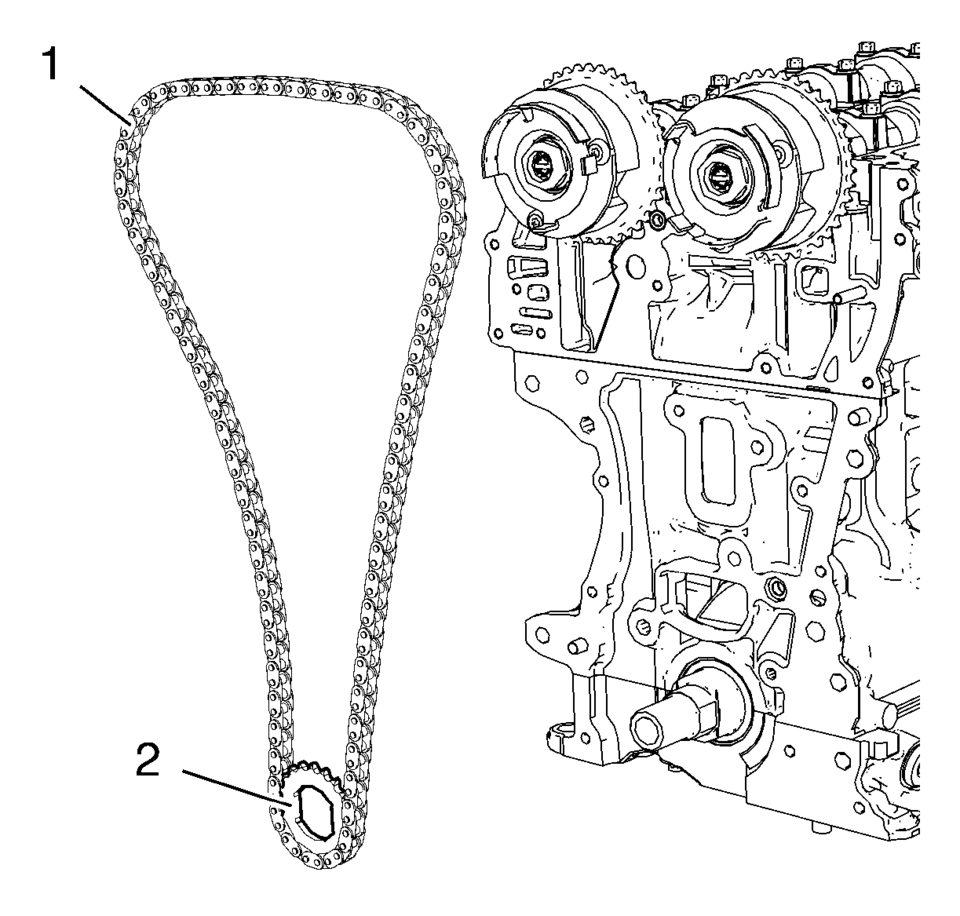
- Remove the timing chain (1) and crankshaft sprocket (2) together as a unit.
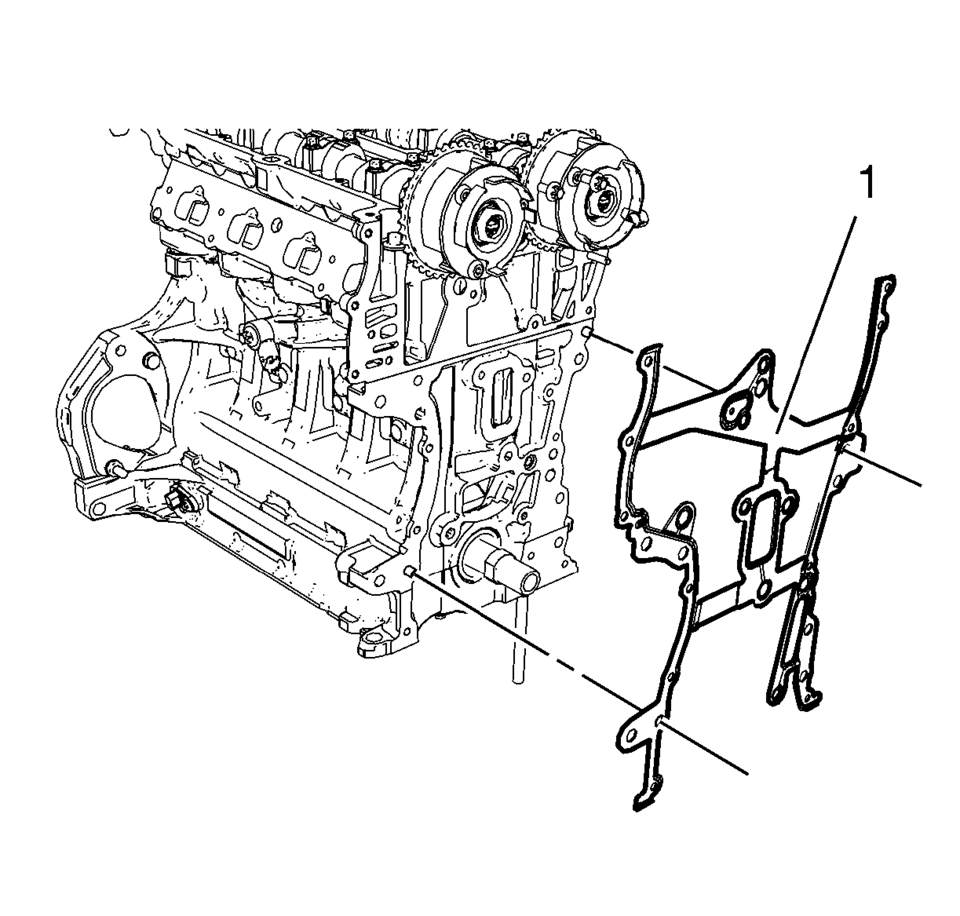
- Remove the engine front cover gasket (1).
Note:
If EN-955 fixing pin can not be inserted, compress the timing chain tensioner further with the aid of a flat bladed tool to allow complete insertion of the pin.

ii 0/
- Installation Procedure
-
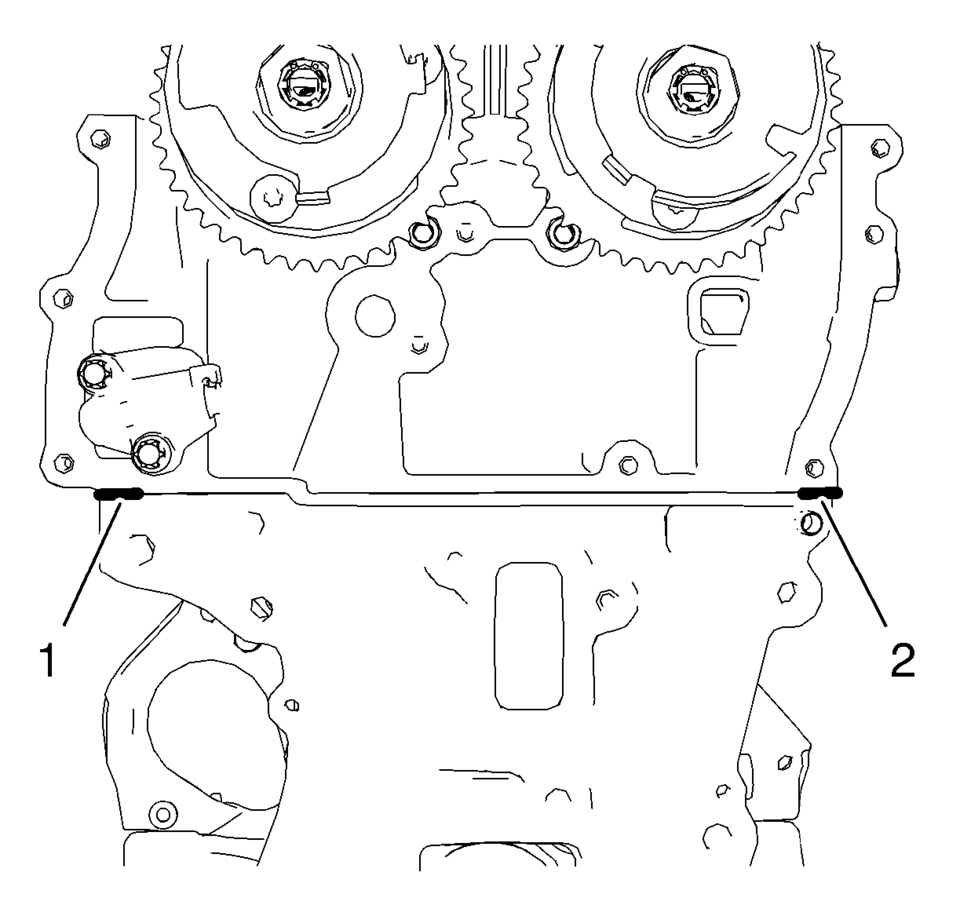
- Clean the engine front cover sealing surfaces on engine block and cylinder head.
- Apply a 2 mm (0.0787 in) bead of RTV sealant the areas shown above (1, 2).
- Install the engine front cover gasket (1).
- Install the two upper timing chain guide bolts (1) and tighten to 8 N•m (71 lb in).
- Install the upper timing chain guide (2).
- Install the timing chain (1) and crankshaft sprocket (2) together as a unit.
- Install the timing chain tensioner shoe (1).
- Install the timing chain tensioner shoe bolt (2) and tighten to 20 Y
(15 lb ft)
.
- Install the timing chain guide right side (1).
- Install the timing chain guide right side bolts (2) and tighten to
8 Y (71 lb in)
.
- Push the timing chain (2) in direction of the timing chain tensioner (1) and remove EN-955 pin (3).
- Install the engine front cover. Refer to Engine Front Cover with Oil Pump Replacement.
ii 0/
Caution:
Refer to Fastener Caution.
 Camshaft Timing Chain Removal
Special Tools
EN-952 Fixing Pin
EN-953-A Fixing Tool
EN-955-10 Fixing Pin from EN-955 Kit
For equivalent regional tools, refer to Special Tools.
The engine should be adjusted to TDC.
...
 Timing Belt Adjustment
Special Tools
EN-652 Flywheel Holder
EN-6333 Locking Pin
EN-6340 Locking Tool
EN-6628-A Locking Tool
EN-45059 Torque Angle Sensor Kit
For equivalent regional tool, refer to Special T ...
Other materials:
Headlamp Bracket Replacement
Headlamp Bracket Replacement
Callout
Component Name
Preliminary Procedure
Remove the front bumper fascia. Refer to Front Bumper Fascia Replacement.
1
Headlamp Bracket Screw (Qty:?€‰4)
...
Tire Inflation Description
When you inflate the tires to the recommended inflation pressures, the factory-installed
wheels and tires are designed in order to handle loads to the tire's rated load
capacity. Incorrect tire pressures, or under-inflated tires, can cause the following
conditions:
Vehicle handling co ...
Intake Camshaft Removal
Remove the camshaft bearing cap bolts in a spiral sequence as shown one
turn at a time until there is no spring tension pushing on the camshaft.
Note: Mind the markings on the camshaft bearing caps to ensure
they will be installed in the same position.
Remove the ...

0.0192