Chevrolet Sonic Repair Manual: Clutch and Differential Housing Disassemble
Special Tools
- M-680770 Universal Sliding Mallet
- R-0007758 Holding Fixture
- R-0407008 Counter Shaft Bearing Remover
- R-0407010 Input Shaft Needle Bearing Puller and Driver
- R-0407013 Gearshift Device Bushing Puller
- R-0007761 Universal Handle for Pullers and Installers
- T-0207928 Retainer Remover
For equivalent regional tools, refer to Special Tools.
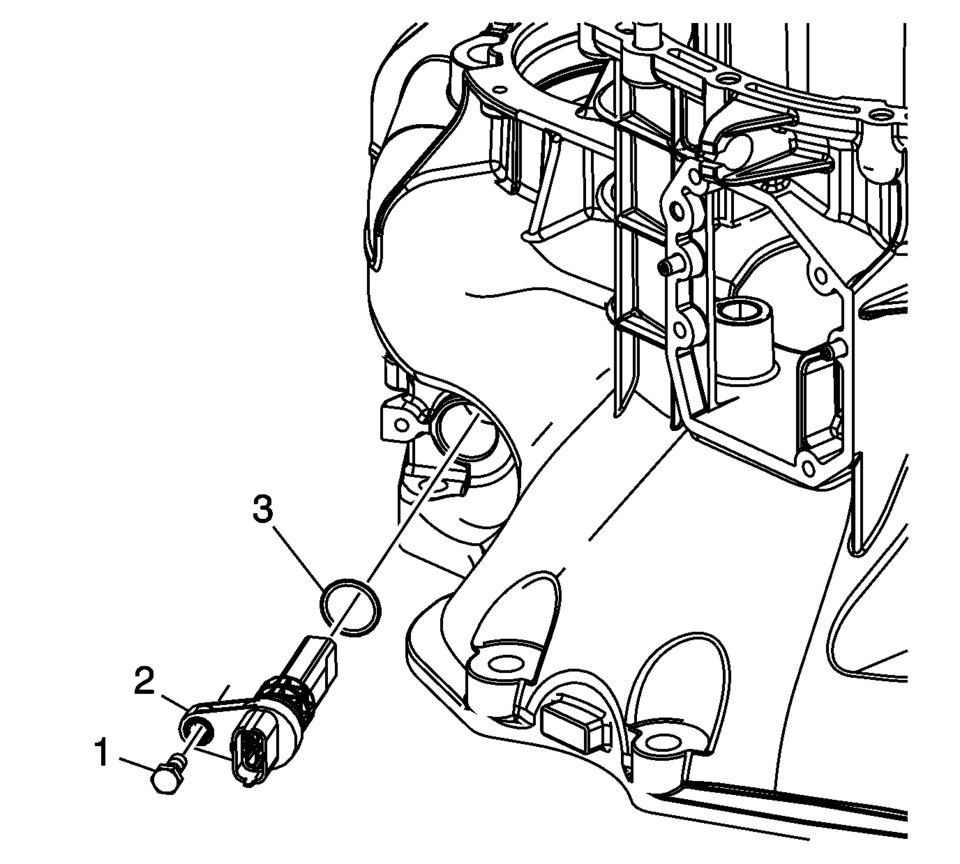
- Remove the vehicle speed sensor bolt (1) and vehicle speed sensor assembly (2).
- Remove and discard the vehicle speed sensor O-ring seal (3).
- Remove the transmission magnet (1).
- Using the T-0207928 retainer remover (3) with the M-680770 sliding mallet (2) remove the front wheel drive shaft oil seal assembly (1).
- Remove the clutch yoke shaft bushings (1).
- Remove the clutch release bearing collar bolt (1).
- Remove the clutch release bearing collar (2).
- Remove the clutch release bearing collar O-ring seal (3).
- Remove the input shaft front bearing assembly (3) using the R-0407010 driver (2) and the R-0007761 handle (1).
- Remove the main shaft front bearing assembly (1) using the R-0407008 remover .
- Remove the shift shaft bushings (3) using the R-0407013 puller (2) and the M-680770 mallet (1).
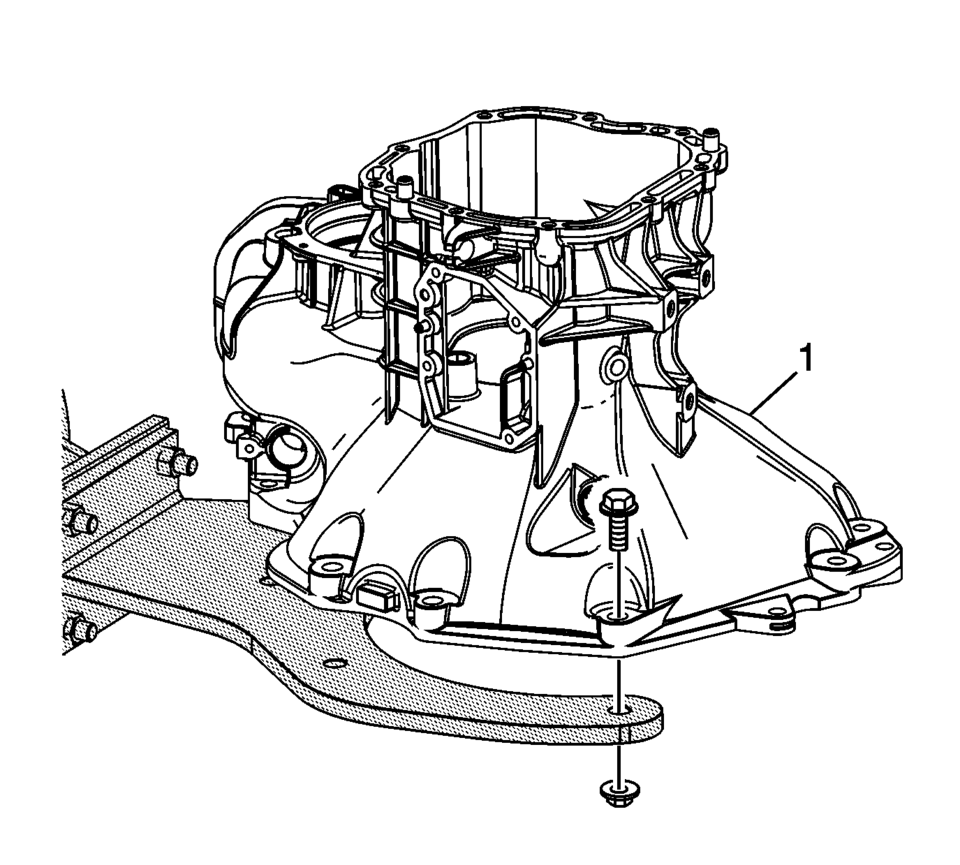
- Remove the clutch and differential housing (1) from the R-0007758 holding fixture .


 Clutch and Differential Housing Cleaning and Inspection
Warning: Wear safety glasses to avoid injury when using compressed
air or any cleaning solvent. Bodily injury may occur if fumes are inhaled
or if skin is exposed to chemicals.
...
 Differential Carrier Removal (6T30)
Differential Carrier Removal
Callout
Component Name
1
Differential Carrier Assembly
2
Final ...
Other materials:
Turbocharger Assemble
Caution: Refer to Fastener Caution.
Install the NEW quick fitting connector (2) and a NEW seal ring (1) to the
turbocharger and tighten to 20 Y (15 lb ft).
Inspect the turbocharger coolant pipes for ridges and damage.
Install the tur ...
Oil Level Indicator and Tube Installation
Install a NEW oil level indicator tube gasket.
Install the oil level indicator tube (2).
Caution: Refer to Fastener Caution.
Install the oil level indicator tube bolt (1) and tighten to 15 Y (11 lb ft).
Install the oil dipstick.
...
Timing Belt Upper Front Cover Installation
Install the timing belt upper front cover (1).
Caution: Refer to Fastener Caution.
Install the 2 timing belt upper front cover bolts (2) and tighten to
6 Y(53 lb in).
...

0.0063