Chevrolet Sonic Repair Manual: Engine Oil and Oil Filter Replacement
- Removal Procedure
-
- Open hood.
- Place a drain pan below the vehicle.
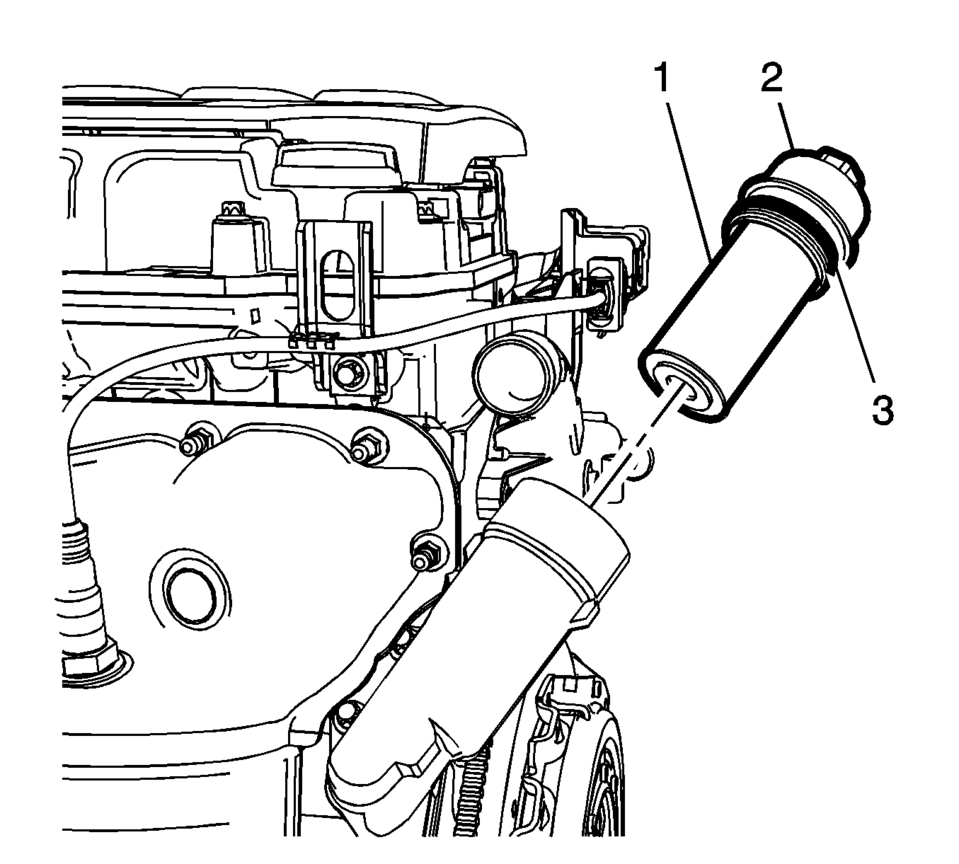
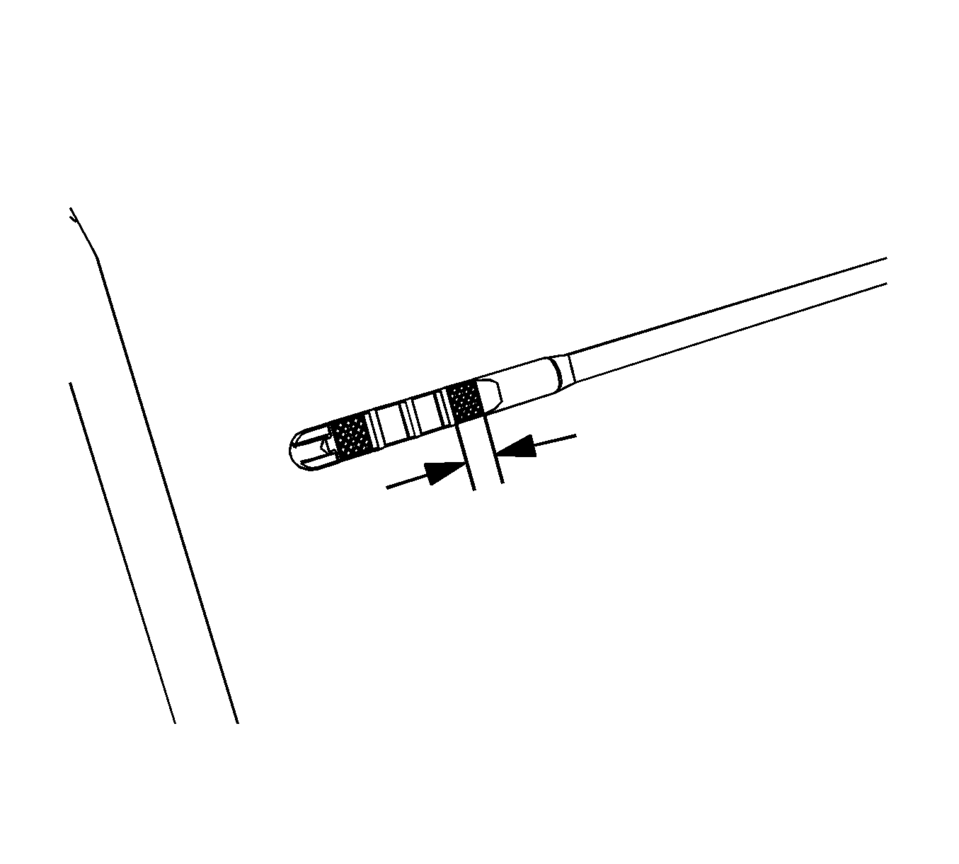
- Using a 24mm socket or closed end wrench loosen oil filter cap. Unscrew filter cap 3 turns and let oil filter and cap assembly drain in housing for 30 seconds.
- Remove the engine oil filter cap (2) with the engine oil filter cap seal ring (3) and the oil filter element (1).
- Raise and support the vehicle. Refer to Lifting and Jacking the Vehicle.
- Remove the oil pan drain plug and allow the oil to drain into the drain pan.
Caution:
To prevent damage to oil filter cap ensure proper tool is used. Do not use an open end wrench which may cause damage to filter cap.
Note:
Use care when removing engine oil filter cap and filter to minimize fluid spillage. If fluid spillage occurs it must be cleaned with appropriate cleaner.
Note:
Inspect oil filter cap for any cracks or damage. If oil filter cap is damaged it must be replaced.
- Installation Procedure
-
- Clean the oil pan drain plug thread in the oil pan.
- Install a NEW seal ring to the oil pan drain plug.
- Install the oil pan drain plug and tighten to 14 Y (10 lb ft)
.
- Lower the vehicle.
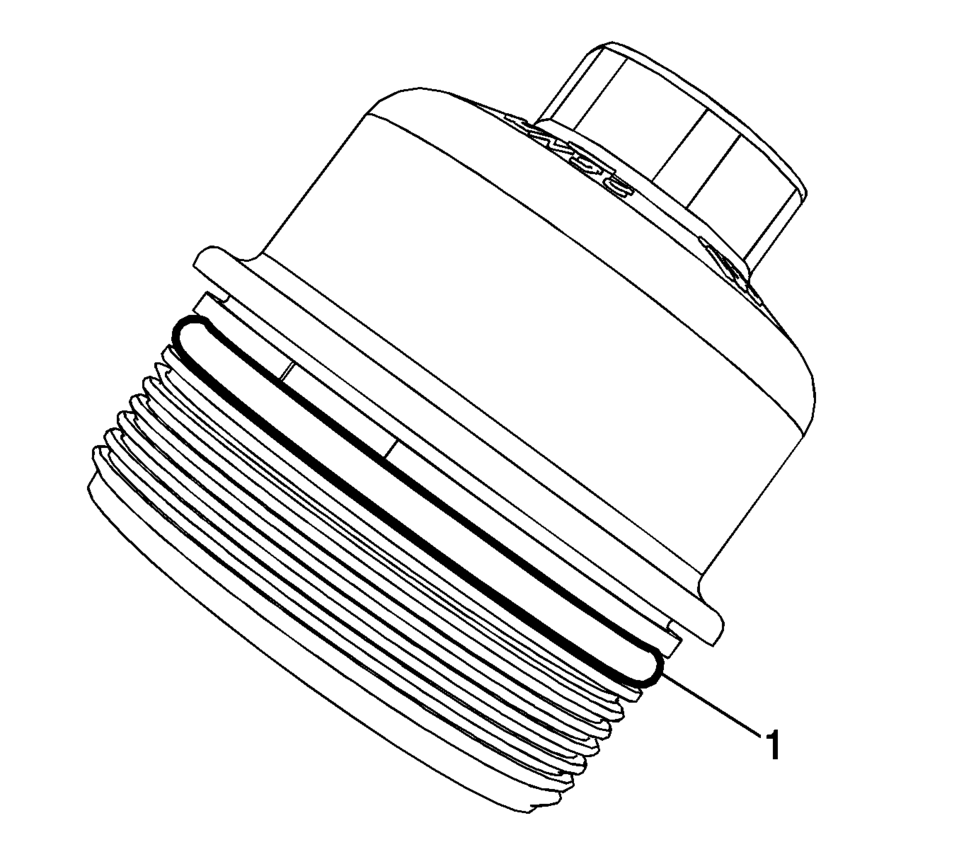
- Install a NEW oil filter cap seal ring (1).
- Install the engine oil filter cap (2) with NEW engine oil filter cap seal ring (3) and NEW oil filter element (1) hand tight.
- Using a 24mm socket or closed end wrench tighten the engine oil filter
cap to 25 Y (18 lb ft)
.
- Fill engine with NEW oil using Dexos?E 5W-30 specification.
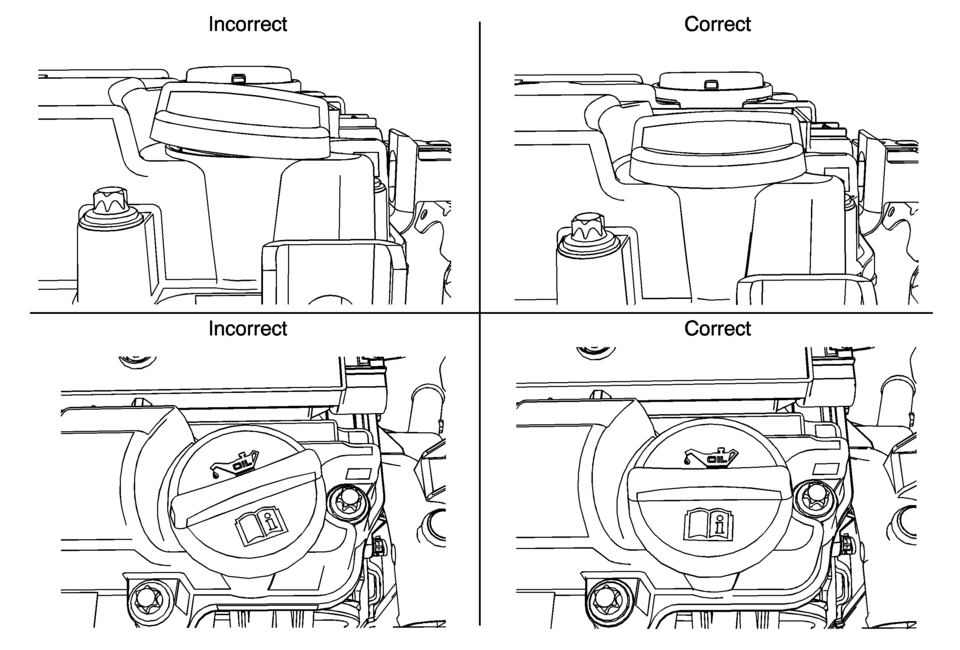
- Install oil fill cap.
- Start the engine and allow it to run until the oil pressure control indicator goes off. Inspect for any oil leaks around the drain plug, oil filter and oil fill cap.
- Inspect the engine oil level. The oil level should be in the cross-hatched section of the oil level indicator as shown.
- Close hood.
- Reset the engine oil life system monitor.
Caution:
Refer to Component Fastener Tightening Caution.
Note:
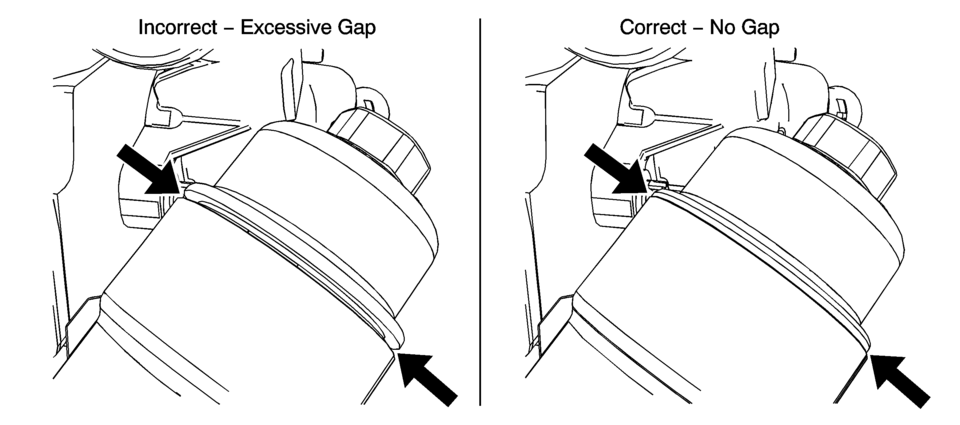
Clean oil filter cap and lubricate the NEW oil filter cap seal ring with clean engine oil. Ensure oil filter cap seal ring is in proper position as shown.
Caution:
Ensure oil filter cap is completely seated on oil filter housing. If not completely seated an oil leak may occur.
Caution:
Over torquing the oil filter cap may cause damage to the oil filter cap resulting in an oil leak.
Caution:
Using engine oils of any viscosity other than those viscosities recommended could result in engine damage.
Note:
Do not overfill the engine with engine oil.
Note:
Anytime engine oil is added (top off or oil changes) ensure all engine surfaces are completely free of residual oil. If there is oil on any engine surface clean as necessary.
correct incorrect
Note:
Oil fill cap must be properly seated and tightened during installation.
 Draining Fluids and Oil Filter Removal
Place a drip pan underneath.
Remove the oil filter cap (1).
Remove the oil filter cap seal (2).
Remove and properly dispose of the oil filter insert (3).
Re-instal ...

Other materials:
Seat Adjustment
Manual Seats
Warning: You can lose control of the vehicle if you try to adjust
a driver seat while the vehicle is moving. Adjust the driver seat only when
the vehicle is not moving.
To adjust a manual seat:
Pull the handle at the front of the seat.
Slide the ...
Blower Motor Replacement
Removal Procedure — Production Blower Motor
Remove the passenger side instrument panel insulator. Refer to Instrument
Panel Insulator Replacement.
Remove the passenger side inflatable restraint instrument panel lower
module. Refer to Instrument Panel Lower Airbag Replaceme ...
Torque Converter Housing with Fluid Pump Assembly Removal (Non Hybrid)
Torque Converter Housing with Fluid Pump Assembly Removal
Callout
Component Name
1
Torque Converter and Differential Housing Bolts M8 x 30 (Qty: 15)
2
Torque Conv ...

0.0127