Chevrolet Sonic Repair Manual: Front Differential Carrier Cleaning and Inspection
|
Callout |
Component Name |
|---|---|
|
Caution: After cleaning the transmission components, allow to air dry. Do not use cloth or paper towels in order to dry any transmission components. Lint from the towels can cause component failure. Caution: Do not reuse cleaning solvents. Previously used solvents may deposit sediment which may damage the component. Caution: Keep thrust washers with the gear it was matched to. The thrust washers are selective sizes and it is difficult to identify the proper washer thickness. Improper assembly can cause premature failure of the differential assembly.
|
|
|
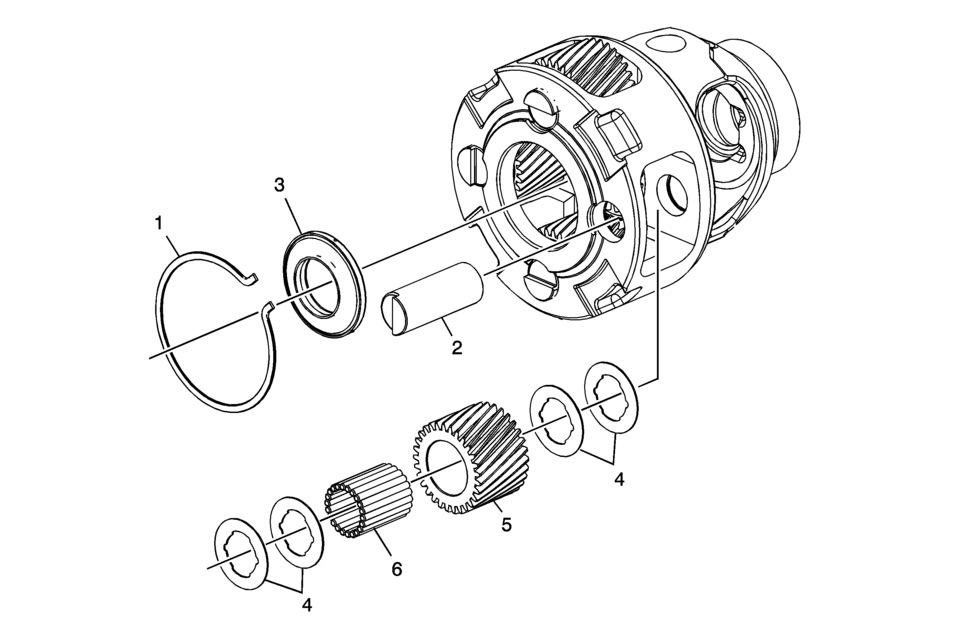
1 |
Front Differential Pinion Gear Shaft Retainer |
|
2 |
Front Differential Pinion Gear Pin |
|
3 |
Sun Gear to Differential Housing Bearing Assembly |
|
4 |
Front Differential Pinion Gear Washer |
|
5 |
Front Differential Pinion Gear |
|
6 |
Front Differential Planetary Pinion Gear Bearing Roller |
 Differential Carrier Removal (6T40/45/50)
Differential Carrier Removal
Callout
Component Name
1
Front Differential Carrier Bearing Assembly
2
...
 Front Differential Carrier Installation (6T30)
Front Differential Carrier Installation
Callout
Component Name
1
Final Drive Sun Gear
2
Diff ...
Other materials:
Forward Collision Alert (FCA) Warning Light
These lights are on the center of the instrument panel.
The vehicle ahead light comes on when a vehicle is detected ahead and a possible
collision can occur.
The forward collision alert comes on when following a vehicle much too closely.
The light flashes when a vehicle is being rapidly ap ...
License Plate Lamp
Lamp Assembly
Bulb Assembly
1. Bulb Socket
2. Bulb
3. Lamp Assembly
To replace one of these bulbs:
1. Push the left end of the lamp assembly toward the right.
2. Turn the lamp assembly down to remove it.
3. Turn the bulb socket (1) counterclockwise to remove it from the lamp assembly
( ...
Rear Side Door Trim Replacement (Sedan)
Rear Side Door Trim Replacement
Callout
Component Name
1
Rear Side Door Inside Handle Bolt Cap
2
Rear Side Door Inside Handle Fastener
Caution: Refer to Fastener Caution.
Proce ...

0.0056