Chevrolet Sonic Repair Manual: Timing Belt Removal
Special Tools
- EN-6333 Locking Pin
- EN-6340 Locking Tool
For equivalent regional tools, refer to Special Tools.
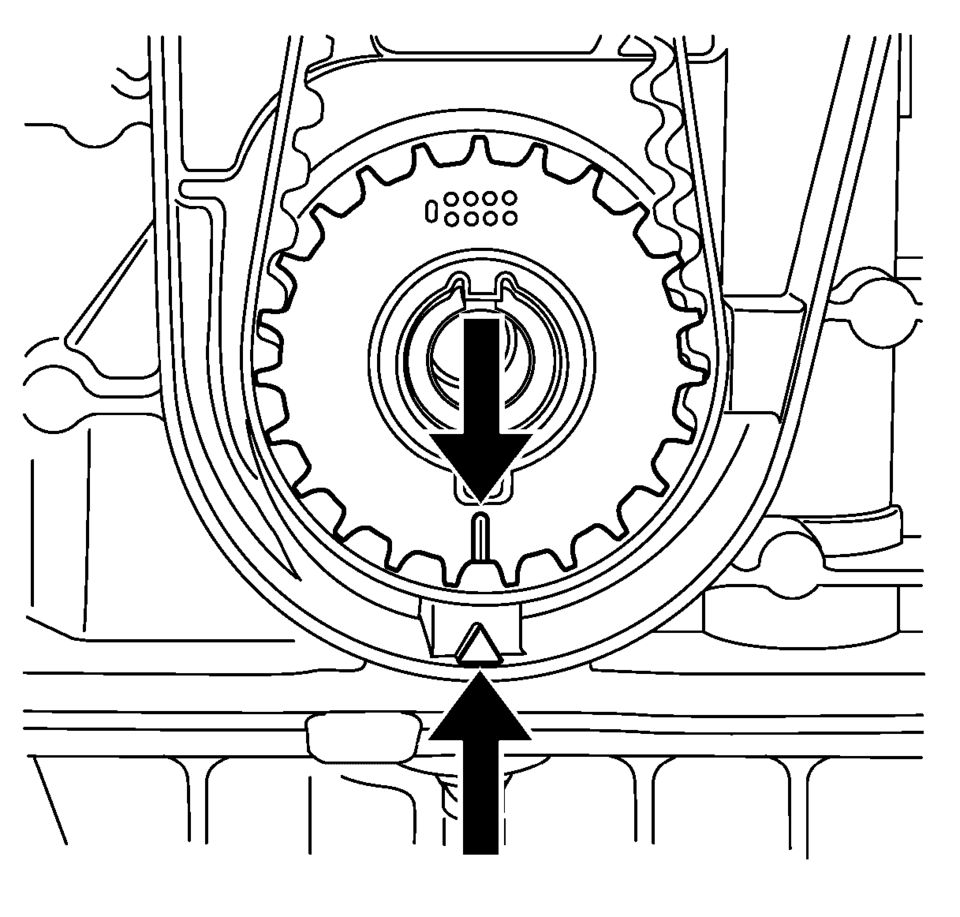
- Turn the crankshaft in the direction of engine rotation, by the crankshaft balancer bolt, to cylinder 1 TDC of combustion stroke.
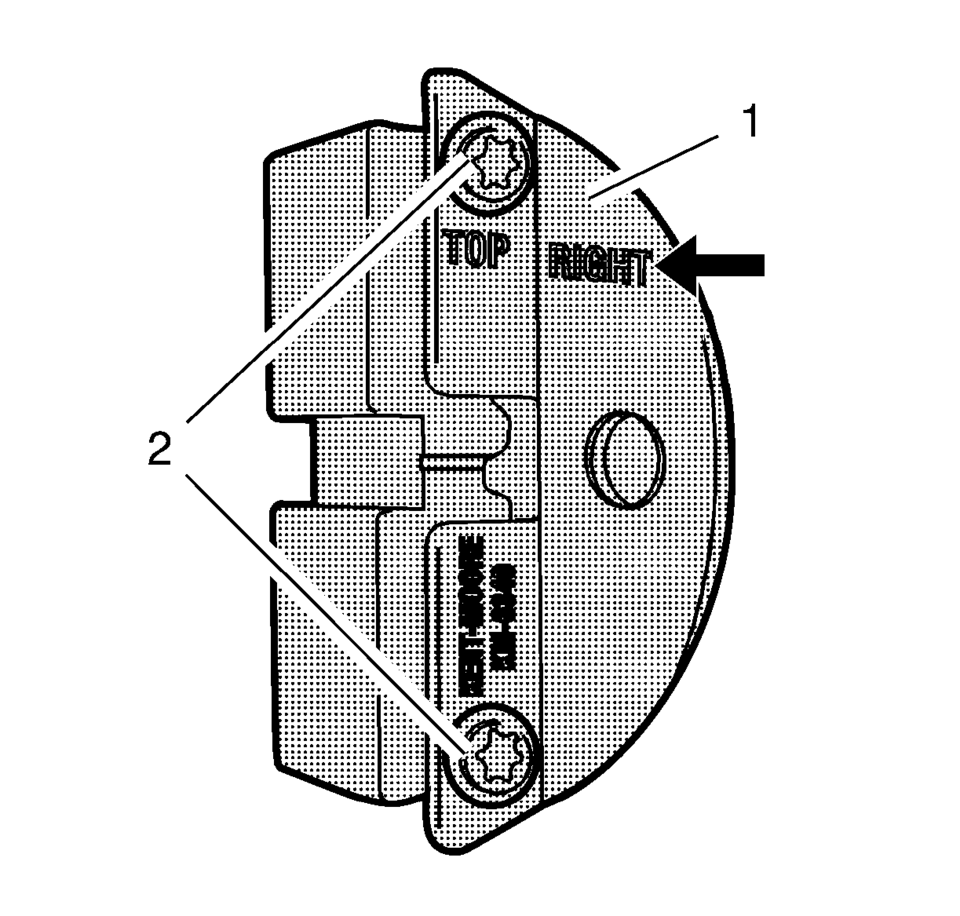
- Prepare the right half of the EN-6340 locking tool .
- Remove the 2 bolts (2).
- Detach the front panel (1) from the EN-6340 locking tool - right.
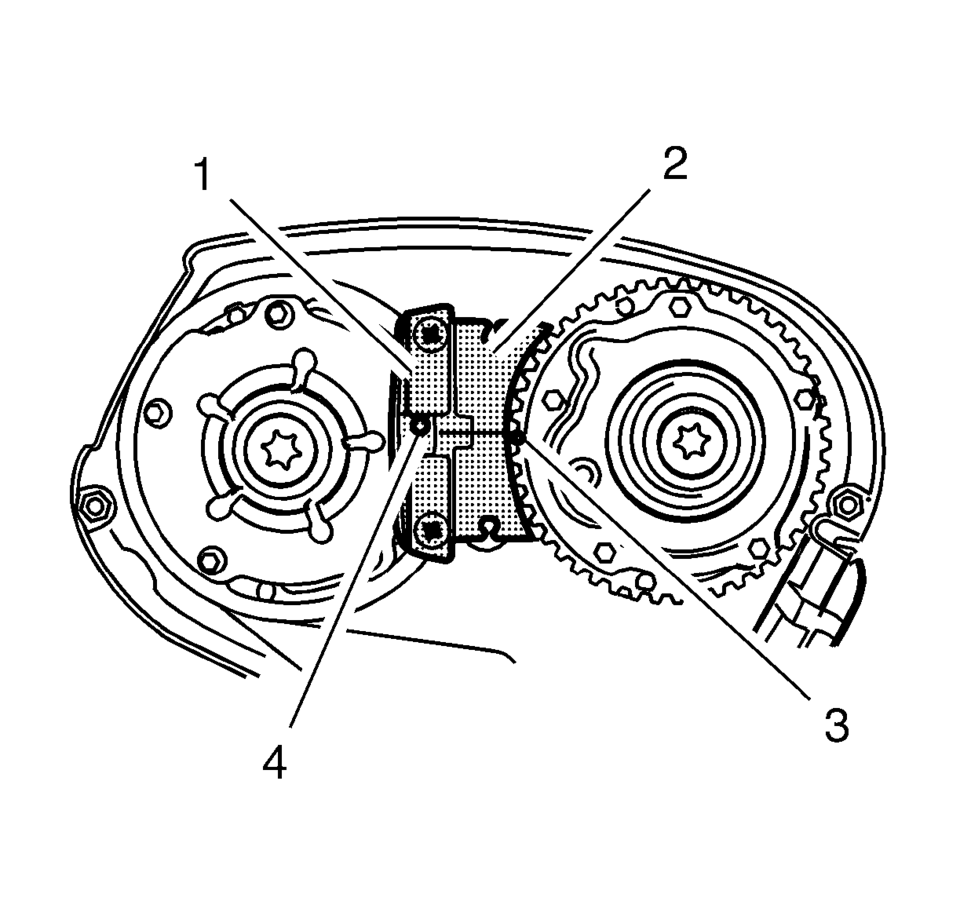
- The spot type marking (4) on the intake camshaft adjuster does not correspond to the groove of the EN-6340 locking tool - left (1) during this process, but must be somewhat above.
- The spot type marking (3) on the exhaust camshaft adjuster must correspond to the groove on EN-6340 locking tool - right (2).
- Insert the EN-6340 locking tool - left (1) and the EN-6340 locking tool - right (2) in the camshaft adjuster.
- Install the EN-6333 locking pin (3), apply tension to the timing belt tension roller (2) in the direction of the arrow, using an Allen key (1).
- Stop the timing belt tensioner.
- Remove the timing belt (1).
Note:
The timing belt drive gear and oil pump housing must align.
Note:
The right half of the EN-6340 locking tool can be recognized by the lettering right, arrow, on the tool.
Note:


Note:
Observe direction of rotation.
 Timing Belt Rear Cover Replacement
Timing Belt Rear Cover Replacement
Callout
Component Name
Preliminary Procedures
Remove the camshaft sprocket. Refer to Camshaf ...
 Timing Belt Replacement
Special Tools
EN-6333 Timing Belt Tensioner Locking Pin
EN-6340 Camshaft Locking Tool
For equivalent regional tools, refer to Special Tools.
Removal Procedure
Note: If the ...
Other materials:
Engine Coolant Thermostat Replacement (LUV)
Removal Procedure
Drain the cooling system. Refer to Cooling System Draining and Filling.
Remove the air cleaner outlet duct. Refer to Air Cleaner Outlet Duct
Replacement.
Remove the engine coolant temperature sensor connector (1).
Disconnect the radi ...
Electronic Component Description
Control Solenoid Valve Assembly
(1)
Pressure Control Solenoid 3 (R-1/4-5-6)
(2)
(GEN 1) Pressure Control Solenoid 2 (3-5-R)
(2)
(GEN 2) Pressure Control Solenoid 5 (1-2-3-4)
...
Transmission Replacement (With 1.6L or 1.8L Engine)
Removal Procedure
Remove the battery tray. Refer to
Battery Tray Replacement.
Without draining the coolant or removing the hoses,
remove and position aside the radiator surge tank. Refer to
Radiator Surge Tank Replacement.
Remove the transmission range selector lever c ...

0.0066