Chevrolet Sonic Repair Manual: Camshaft Intake and Exhaust Sprocket Replacement
Special Tools
EN-955-A Locking Pin
For equivalent regional tools, refer to Special Tools.
- Removal Procedure
-
- Remove the air cleaner assembly. Refer to Air Cleaner Assembly Replacement.
- Remove the camshaft cover. Refer to Camshaft Cover Replacement.
- Remove both camshaft position actuator solenoid valves. Refer to Camshaft Position Actuator Solenoid Valve Replacement.
- Adjust the engine to TDC. Refer to Camshaft Timing Chain Adjustment.
- Remove the timing chain tensioner plug (1) from the engine front cover.
- Install a wrench (1) on the cast hexagonal portion of the intake camshaft, rotate the camshaft toward the exhaust camshaft in order to apply tension.
- Install EN-955-A pin (2) to the timing chain tensioner bore (1) to secure it in place.
- Remove the wrench from intake camshaft.
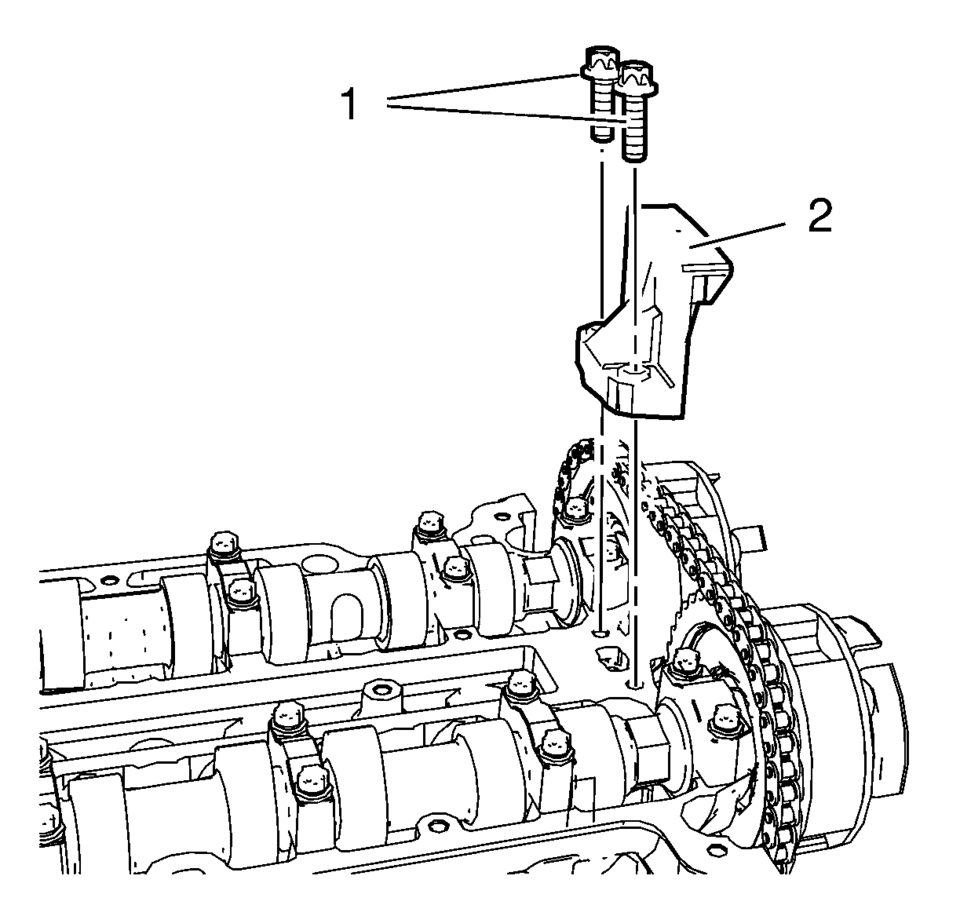
- Remove the upper timing chain guide bolts (1).
- Remove the upper timing chain guide (2).
- Loosen the intake camshaft sprocket bolt (2) while holding up the hexagon of the intake camshaft with a wrench (1).
- Loosen the exhaust camshaft sprocket bolt while holding up the hexagon of the exhaust camshaft with a wrench.
- Remove and DISCARD the camshaft sprocket bolts (2) and the camshaft position exciter wheels (1).
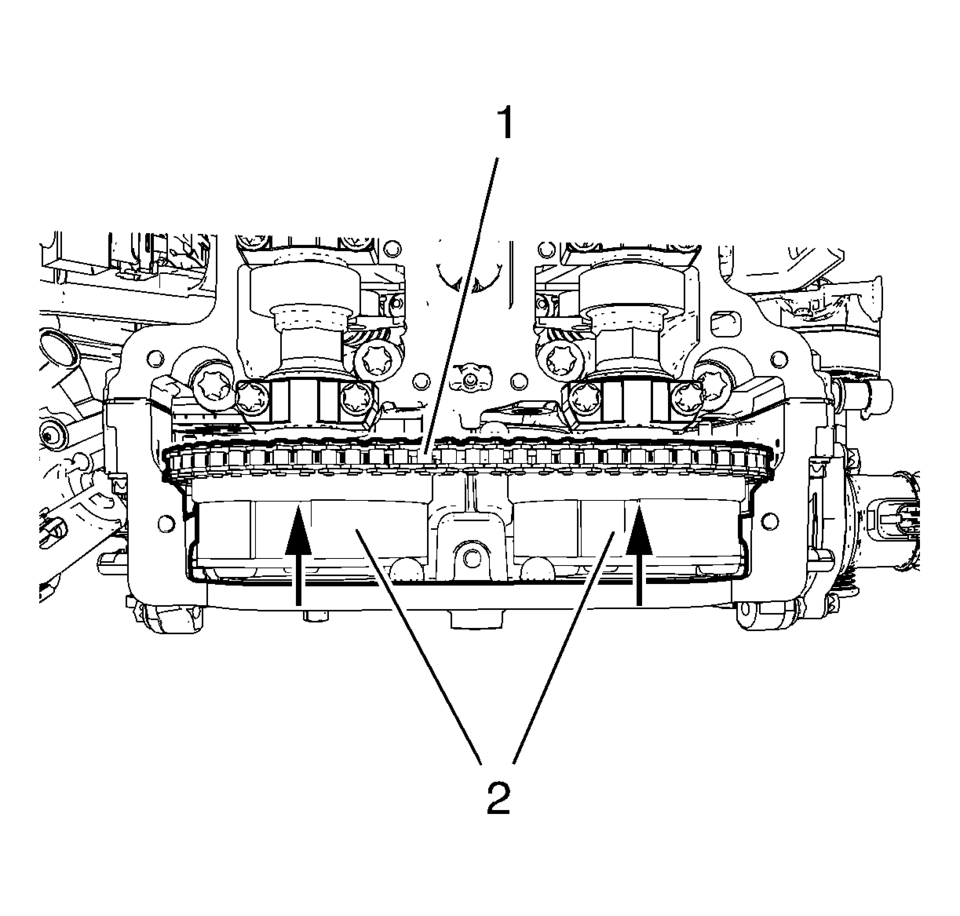
- Remove the camshaft sprockets (2) and timing chain (1) as one unit.
- Remove the intake and exhaust camshaft sprocket.
- Allow the chain to rest on the front cover.


(o


- Installation Procedure
-
- Install the camshaft sprockets (2) and timing chain (1) as one unit.
- Install the camshaft position exciter wheels (1).
- Install the NEW camshaft sprocket bolts (2) hand tight only.
- Remove the EN-955-A pin to apply tension to the timing chain .
- Adjust the camshaft timing chain. Refer to Camshaft Timing Chain Adjustment.
- Install the upper timing chain guide (2).
- Install the upper timing chain guide bolts (1) and tighten to 8 Y
(71 lb in)
.
- Install the timing chain tensioner plug (1) and tighten to 50 Y (37 lb ft)
.
- Install both camshaft position actuator solenoid valves. Refer to Camshaft Position Actuator Solenoid Valve Replacement.
- Install the camshaft cover. Refer to Camshaft Cover Replacement.
- Install the air cleaner assembly. Refer to Air Cleaner Assembly Replacement.
- Check and correct engine oil level.
Note:
Engine must be adjusted to TDC.
Caution:
Refer to Fastener Caution.
 Camshaft Installation
Special Tools
EN-422 Installer
For equivalent regional tools, refer to Special Tools.
Note: Coat with MoS 2 lubricating paste. Refer to Adhesives, Fluids,
Lubricants ...
 Camshaft Position Actuator Adjuster Installation
Special Tools
EN-6340 Camshaft Adjuster Locking Tool
EN-6628-A Camshaft Locking Tool
EN-45059 Angle Meter
For equivalent regional tools, refer to Special Tools.
Note: Note t ...
Other materials:
Speaker Replacement Reference
Speaker Replacement Reference
Component
Repair Instruction
Front Door Speaker
Radio Front Side Door Speaker Replacement
Front Tweeter Speaker
Radio Windshield Side Garnish Molding Speaker
...
Fuel System Description
Fuel System Overview
The fuel system is an electronic returnless on-demand design. A returnless
fuel system reduces the internal temperature of the fuel tank by not returning
hot fuel from the engine to the fuel tank. Reducing the internal temperature
of the fuel tank results in lo ...
Manual Shift Shaft Seal Installation
Manual Shift Shaft Seal Installation
Callout
Component Name
1
Manual Shift Shaft Seal
Special Tool
DT-49101 Seal Installer
For equivalent regional tools, refer to Special
Tools.
...
0.008