Chevrolet Sonic Repair Manual: Camshaft Timing Chain Replacement
Special Tools
EN-955 Locking Pin
For equivalent regional tools. Refer to Special Tools.
- Removal Procedure
-
- Remove the engine front cover. Refer to Engine Front Cover with Oil Pump Replacement.
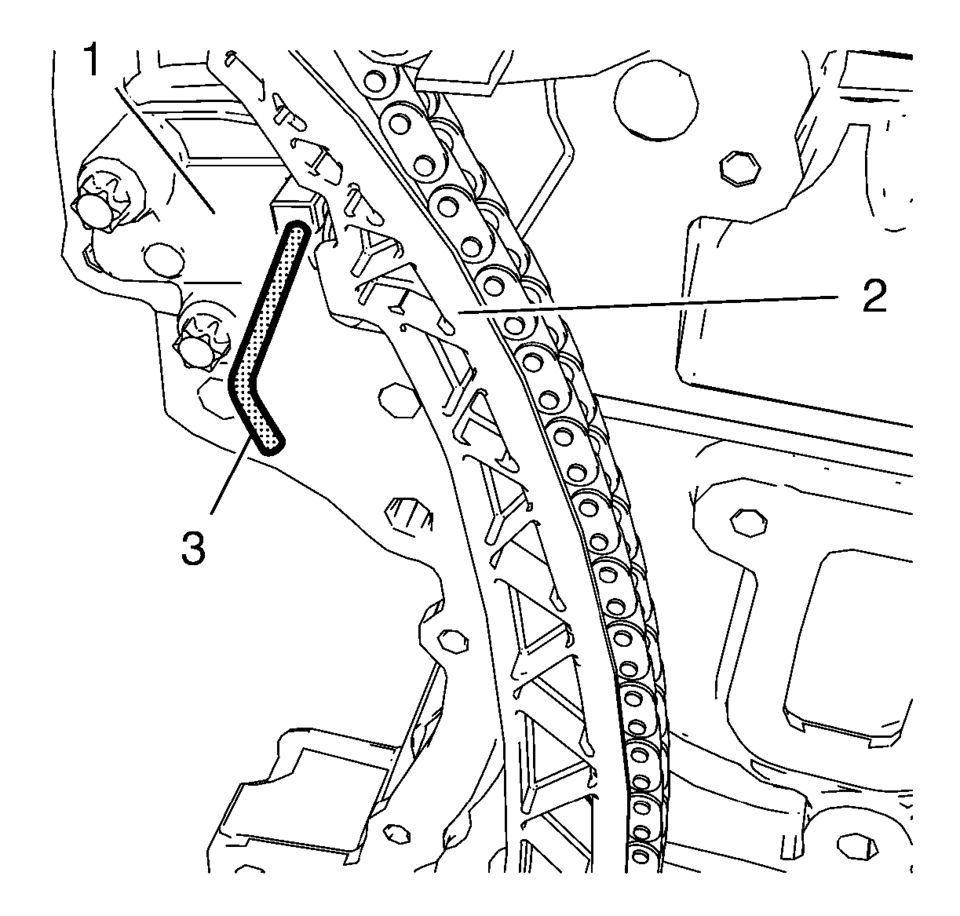
- Push the timing chain (2) in direction to the timing chain tensioner (1) and install the EN-955 pin (3).
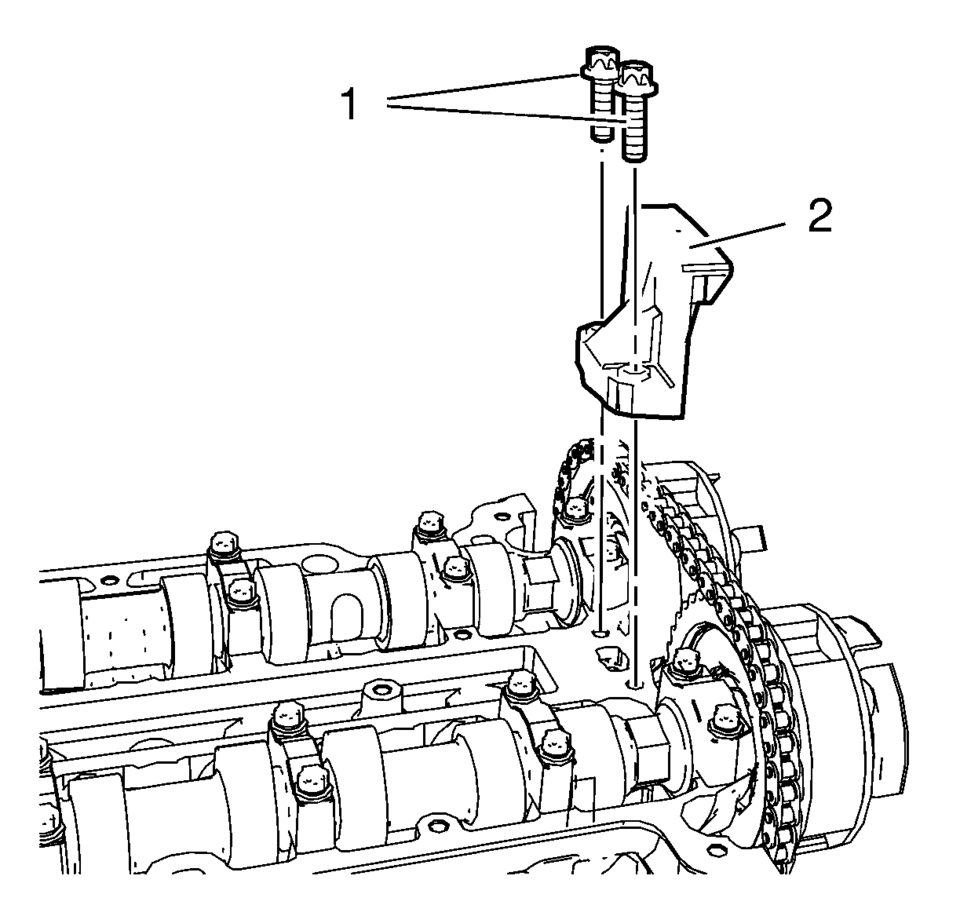
- Remove the two upper timing chain guide bolts (1).
- Remove the upper timing chain guide (2).
- Remove the two timing chain guide right side bolts (2).
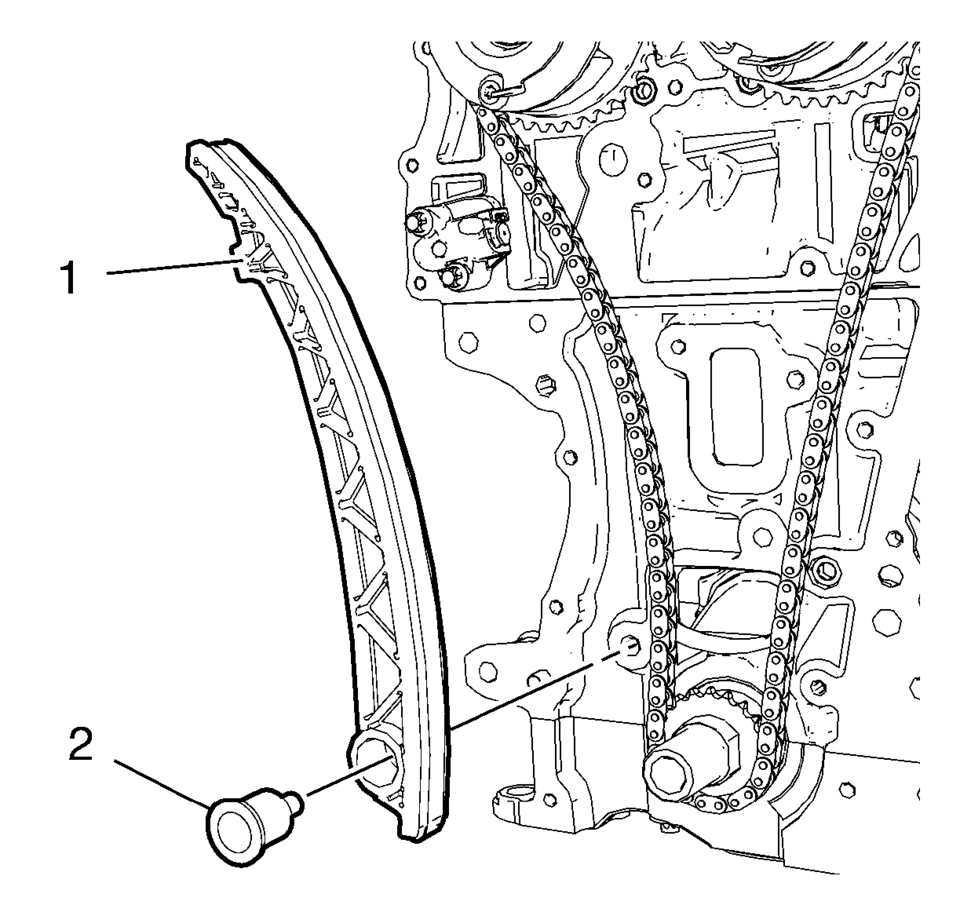
- Remove the timing chain guide right side (1).
- Remove the timing chain tensioner shoe bolt (2).
- Remove the timing chain tensioner shoe (1).
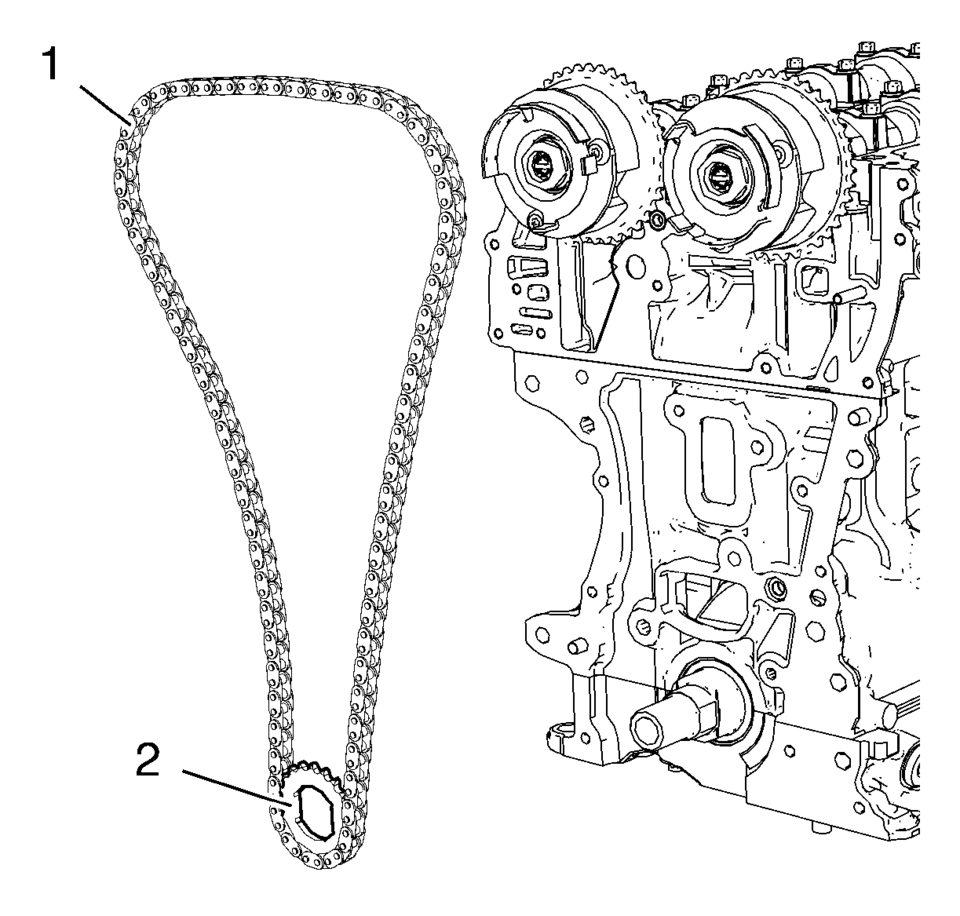
- Remove the timing chain (1) and crankshaft sprocket (2) together as a unit.
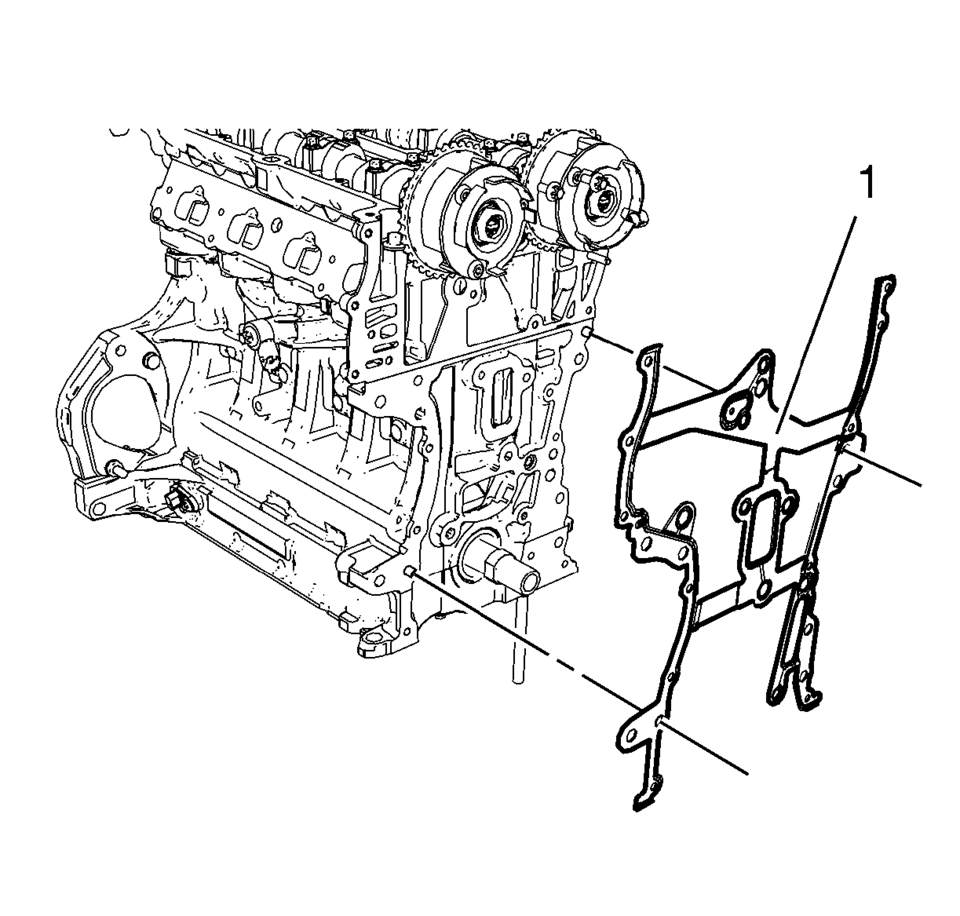
- Remove the engine front cover gasket (1).
Note:
If EN-955 fixing pin can not be inserted, compress the timing chain tensioner further with the aid of a flat bladed tool to allow complete insertion of the pin.

ii 0/
- Installation Procedure
-
- Clean the engine front cover sealing surfaces on engine block and cylinder head.
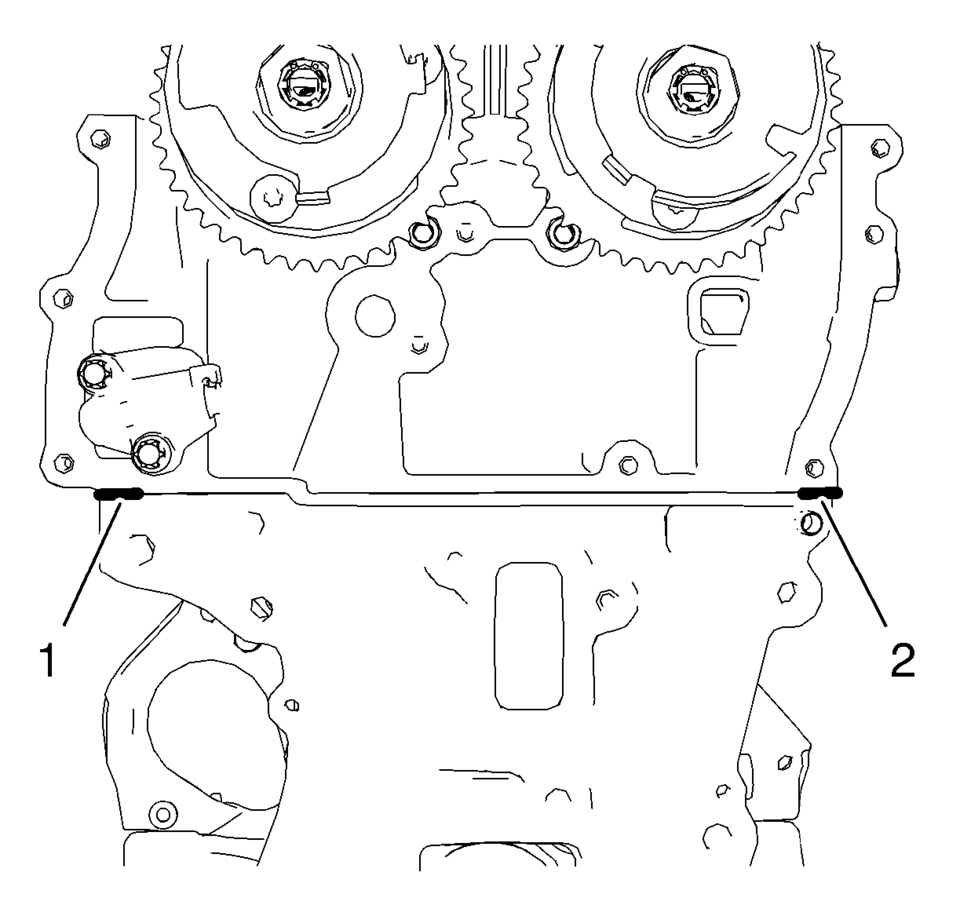
- Apply a 2 mm (0.0787 in) bead of RTV sealant the areas shown above (1, 2).
- Install the engine front cover gasket (1).
- Install the two upper timing chain guide bolts (1) and tighten to 8 N•m (71 lb in).
- Install the upper timing chain guide (2).
- Install the timing chain (1) and crankshaft sprocket (2) together as a unit.
- Install the timing chain tensioner shoe (1).
- Install the timing chain tensioner shoe bolt (2) and tighten to 20 Y
(15 lb ft)
.
- Install the timing chain guide right side (1).
- Install the timing chain guide right side bolts (2) and tighten to
8 Y (71 lb in)
.
- Push the timing chain (2) in direction of the timing chain tensioner (1) and remove EN-955 pin (3).
- Install the engine front cover. Refer to Engine Front Cover with Oil Pump Replacement.
ii 0/
Caution:
Refer to Fastener Caution.
 Camshaft Timing Chain Removal
Special Tools
EN-952 Fixing Pin
EN-953-A Fixing Tool
EN-955-10 Fixing Pin from EN-955 Kit
For equivalent regional tools, refer to Special Tools.
The engine should be adjusted to TDC.
...
 Timing Belt Adjustment
Special Tools
EN-652 Flywheel Holder
EN-6333 Locking Pin
EN-6340 Locking Tool
EN-6628-A Locking Tool
EN-45059 Torque Angle Sensor Kit
For equivalent regional tool, refer to Special T ...
Other materials:
Valve Stem Oil Seal and Valve Spring Replacement
Special Tools
207649 Rod Hairpin Clips
547324 Flange Screws
EN-840 Pliers / Remover
EN-958 Installer
EN-45059 Angle Meter
EN-50717 Kit
J-43649–2 Rods
For equivalent regional tools, refer to Special Tools.
Removal Procedure
Remove the spark plugs. Refer to Spa ...
Electronic Ignition System Description
Electronic Ignition System Operation
The electronic ignition system produces and controls the high energy secondary
spark. This spark ignites the compressed air/fuel mixture at precisely the correct
time, providing optimal performance, fuel economy, and control of exhaust emissions.
...
Basic information
To preserve the premium cabin environment of your Nissan Armada, it is important
to regularly clean and maintain all interior surfaces.
Begin by removing loose dust and debris from interior trim, seats, and plastic
components using a vacuum cleaner or a soft-bristled brush. This helps prevent a ...

0.0701