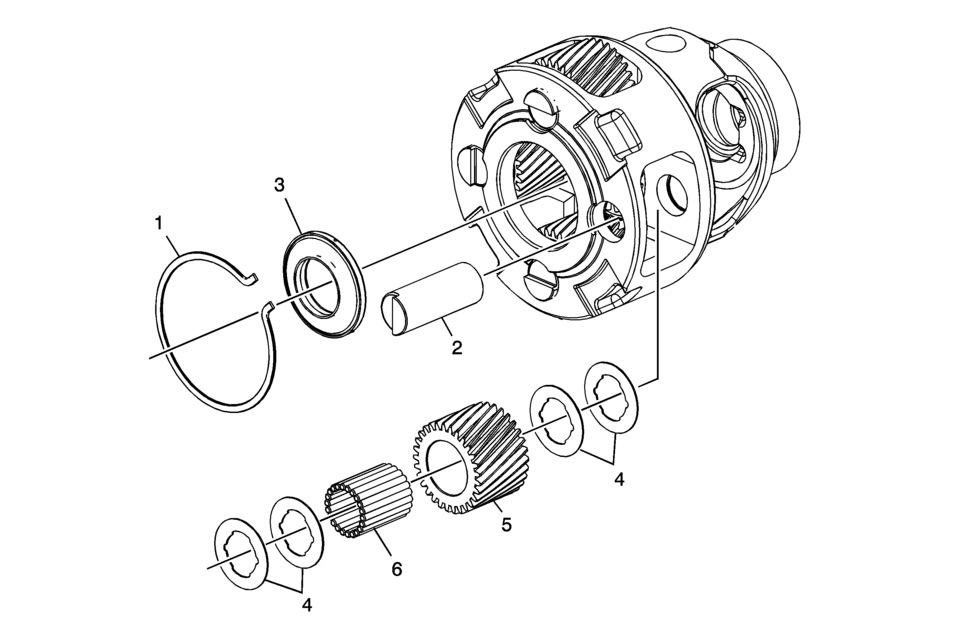
Chevrolet Sonic Repair Manual: Front Differential Carrier Cleaning and Inspection

|
Callout |
Component Name |
|---|---|
|
Caution: After cleaning the transmission components, allow to air dry. Do not use cloth or paper towels in order to dry any transmission components. Lint from the towels can cause component failure. Caution: Do not reuse cleaning solvents. Previously used solvents may deposit sediment which may damage the component. Caution: Keep thrust washers with the gear it was matched to. The thrust washers are selective sizes and it is difficult to identify the proper washer thickness. Improper assembly can cause premature failure of the differential assembly.
|
|
|
1 |
Front Differential Pinion Gear Shaft Retainer |
|
2 |
Front Differential Pinion Gear Pin |
|
3 |
Sun Gear to Differential Housing Bearing Assembly |
|
4 |
Front Differential Pinion Gear Washer |
|
5 |
Front Differential Pinion Gear |
|
6 |
Front Differential Planetary Pinion Gear Bearing Roller |
 Front Differential Carrier Installation (6T30)
Front Differential Carrier Installation
Callout
Component Name
1
Final Drive Sun Gear
2
Diff ...
Other materials:
Safety Belt Pretensioners
This vehicle has safety belt pretensioners for front outboard occupants. Although
the safety belt pretensioners cannot be seen, they are part of the safety belt assembly.
They can help tighten the safety belts during the early stages of a moderate to
severe frontal, near frontal, or rear crash ...
Steering Wheel and Column Description and Operation
The steering wheel and column have the following 4 primary functions:
Vehicle steering
Vehicle security
Driver convenience
Driver safety
Vehicle Steering
The steering wheel is the first link between the driver and the vehicle.
The steering wheel is fastened to a steer ...
Transmission Rear Mount Replacement
Removal Procedure
Raise and support the vehicle. Refer to
Lifting and Jacking the Vehicle.
Using a suitable jack stand, support the rear of the
powertrain.
Remove and DISCARD the transmission mount to bracket
through fastener (1).
Remove the transmiss ...
0.0069

