Chevrolet Sonic Repair Manual: Timing Belt Tensioner Replacement
Special Tools
- EN-6333 Timing Belt Tensioner Locking Pin
- EN-6340 Camshaft Locking Tool
- EN-45059 Torque Angle Sensor Kit
For equivalent regional tools, refer to Special Tools.
- Removal Procedure
-
- Remove the air cleaner assembly. Refer to Air Cleaner Assembly Replacement.
- Remove the drive belt tensioner. Refer to Drive Belt Tensioner Replacement.
- Remove the timing belt upper front cover. Refer to Timing Belt Upper Front Cover Removal.
- Set crankshaft balancer in direction of engine rotation to cylinder 1 TDC of combustion stroke (1).
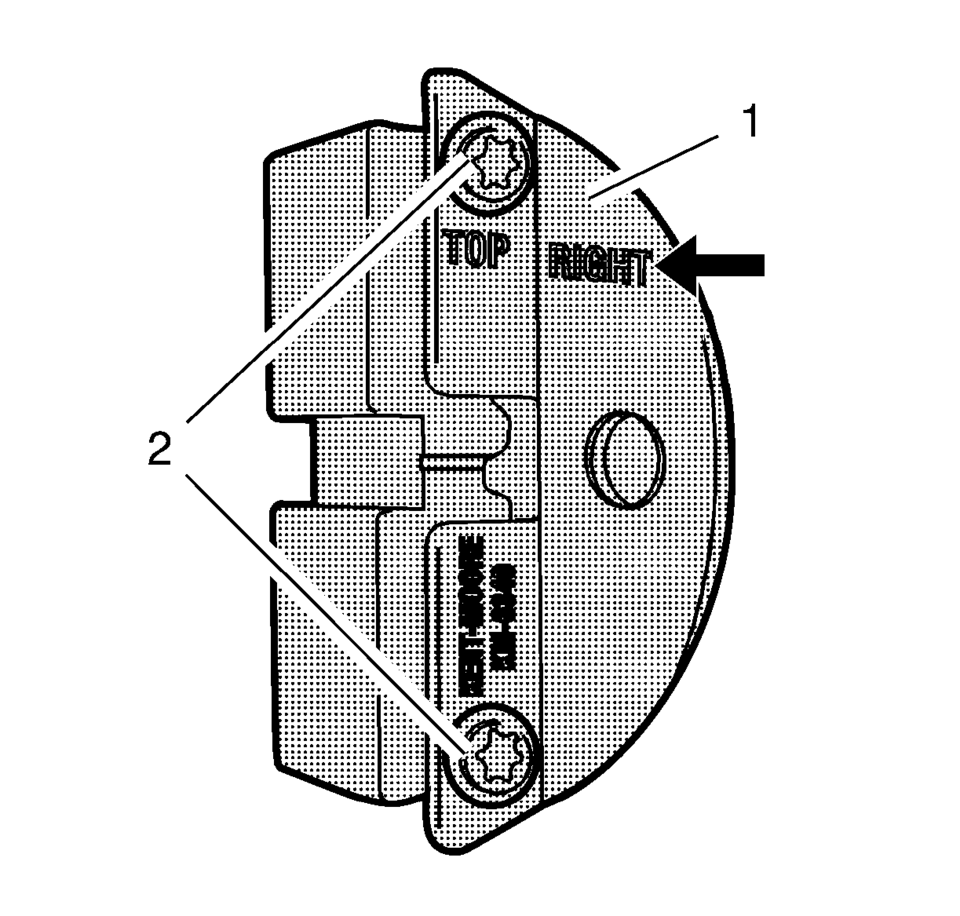
- Prepare the right half of the EN-6340 locking tool.
- Remove the 2 bolts (2).
- Remove the front panel (1).
- Install the EN-6340 locking tool into the camshaft adjusters.
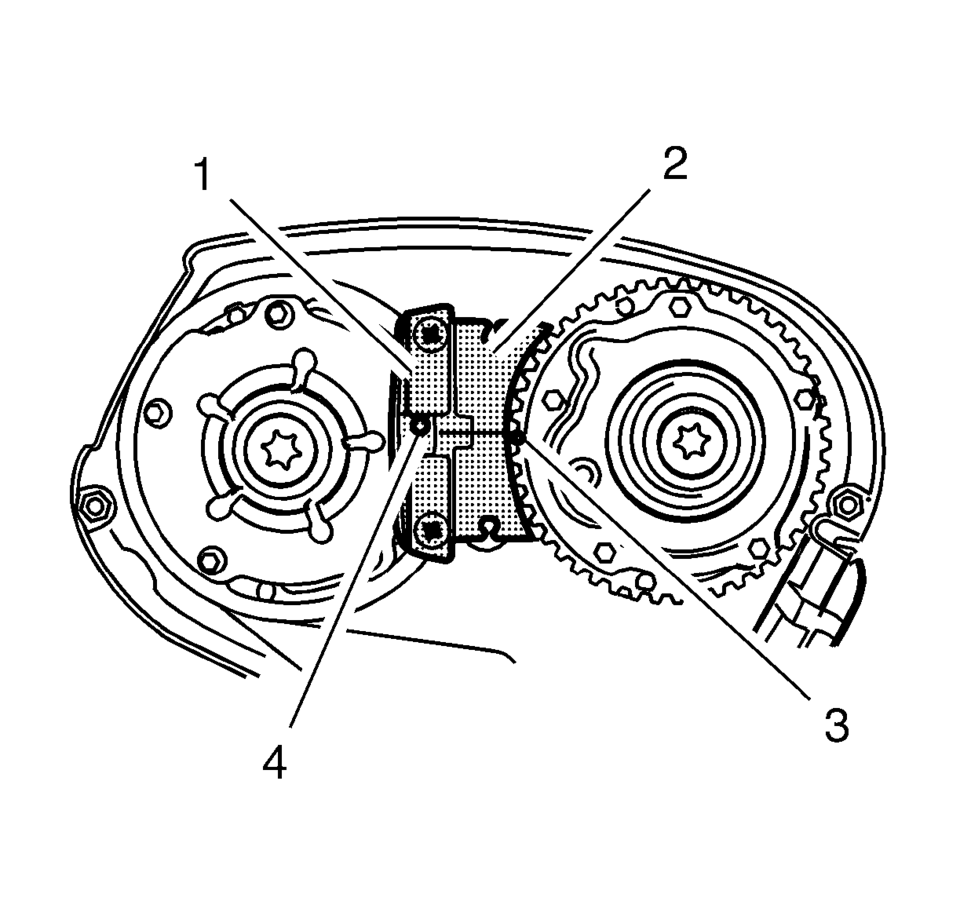
- Install the EN-6340-left locking tool (1) in the camshaft adjusters as shown.
- Install EN-6340-right locking tool (2) in the camshaft adjusters as shown.
- Remove EN-6340 locking tool.
- Remove the crankshaft balancer. Refer to Crankshaft Balancer Replacement.
- Remove the engine mount bracket. Refer to Engine Mount Bracket Replacement.
- Remove the timing belt center front cover. Refer to Timing Belt Center Front Cover Removal.
- Remove the timing belt lower front cover. Refer to Timing Belt Lower Front Cover Removal.
- Loosen the timing belt tensioner bolt.
- Apply tension to the drive belt tensioner (2) in the direction of the arrow, using an allen key (1).
- Install the EN-6333 locking pin (3).
- Remove the timing belt tensioner bolt (1) and the timing belt tensioner (2).
- Discard the timing belt tensioner bolt (1).

Note:
The spot type marking (4) on the intake camshaft adjuster does not correspond to the groove of EN-6340-left during this process but must be somewhat above as shown.
Note:
The spot type marking (3) on the exhaust camshaft adjuster must correspond to the groove on EN-6340-right.


- Installation Procedure
-
- Clean the timing belt tensioner thread.
- Install the timing belt tensioner (2).
- Install a new timing belt tensioner bolt (1).
- Apply tension to the drive belt tensioner (2) in the direction of the arrow, using an allen key (1).
- Remove the EN-6333 locking pin (3).
- Release tension on timing belt tensioner.
- Tighten the timing belt tensioner bolt in three passes using the EN-45059 torque angle:
- First pass tighten to 20 Y (15 lb ft)
.
- Second pass to 120 degrees
.
- Third pass to 15 degrees
.
- Install the timing belt lower front cover. Refer to Timing Belt Lower Front Cover Installation.
- Install the timing belt center front cover. Refer to Timing Belt Center Front Cover Installation.
- Install the engine mount bracket. Refer to Engine Mount Bracket Replacement.
- Install the crankshaft balancer. Refer to Crankshaft Balancer Replacement.
- Check the timing.
- Turn the crankshaft 720 degrees in the direction of engine rotation by the bolt on the crankshaft balancer.
- Install EN-6340-left locking tool (1) into the camshaft adjusters as shown.
- Install EN-6340-right locking tool (2) into the camshaft adjusters as shown.
- Install the drive belt tensioner. Refer to Drive Belt Tensioner Replacement.
- Remove the EN-6340 locking tool.
- Install the timing belt upper front cover. Refer to Timing Belt Upper Front Cover Installation.
- Install the air cleaner assembly. Refer to Air Cleaner Assembly Replacement.
Note:
The timing belt tensioner moves automatically to the correct position.
Caution:
Refer to Fastener Caution.
Note:
Note the marking at the camshaft sprockets.
Note:
The spot type marking (4) on the intake camshaft adjuster does not correspond to the groove of EN-6340-left during this process but must be somewhat above as shown.
Note:
The spot type marking (3) on the exhaust camshaft adjuster must correspond to the groove on EN-6340-right.
Note:
Note the marking at the crankshaft balancer and the cover (1) must align before installing the drive belt.
 Timing Belt Tensioner Removal
Remove the tensioner bolt (1).
Remove the timing belt tensioner (2).
...
 Timing Chain Tensioner Installation
Install the timing chain tensioner (2).
Caution: Refer to Fastener Caution.
Install the 2 timing chain tensioner bolts (1) and tighten to 8 Y (71 ...
Other materials:
Trunk Release
To lock or unlock the trunk from the inside, press
or
on the central locking switch or on
the driver door switch.
To open the trunk from inside the vehicle press
.
To lock the trunk from the outside press
on the RKE transmitter.
To open the trunk from outside of the vehicle:
Pres ...
Instrument Panel Outer Air Outlet Replacement - Right Side
Instrument Panel Outer Air Outlet Replacement - Right Side
Callout
Component Name
Preliminary Procedure
Remove the right instrument panel upper trim panel. Refer to Instrument
Panel Upper Trim Panel Replacement - Right Side ...
Front Wheel Drive Shaft Seal Replacement - Right Side
Special Tools
DT-446 Installer Drift
DT-7004 Slide Hammer
DT-23129 Universal Seal Remover
For equivalent regional tools, refer to Special Tools.
Removal Procedure
Raise and support the vehicle. Refer to Lifting and Jacking the Vehicle.
Remove the front suspension sk ...

0.0099