Chevrolet Sonic Repair Manual: Rear Brake Caliper Replacement
- Removal Procedure
-
Warning:
Refer to Brake Dust Warning.
Warning:
Refer to Brake Fluid Irritant Warning.
- Raise and support the vehicle. Refer to Lifting and Jacking the Vehicle.
- Remove the tire and wheel assembly. Refer to Tire and Wheel Removal and Installation.
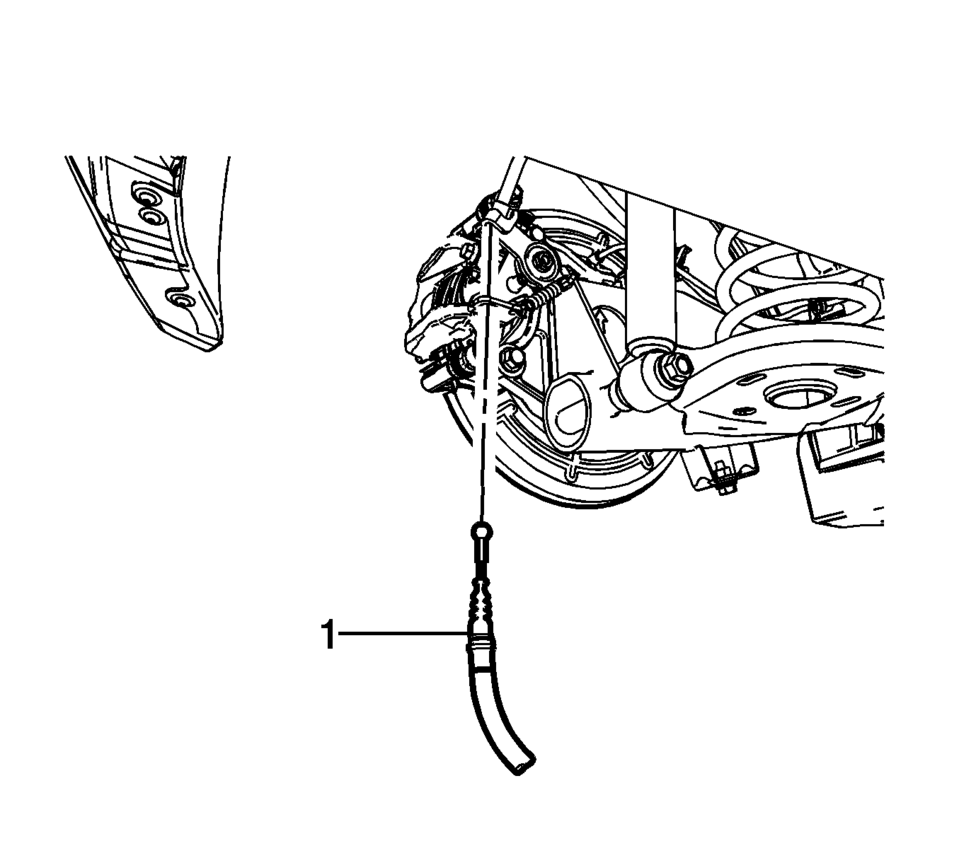
- Remove the parking brake cable retaining clip (1) from the parking brake cable bracket.
- Disconnect the parking brake cable (1) from the actuator lever, remove the cable from the bracket and position aside.
- Remove the brake hose fitting bolt (1).
- Remove and discard the brake hose fitting gaskets (2) from the brake hose fitting (3).
- Cap the brake hose fitting to prevent brake fluid loss and contamination.
- DO NOT use any air tools to remove or install the guide pin bolts. Use hand tools ONLY.
- Install an open end wrench to hold the caliper guide pin in line with the brake caliper while removing or installing the caliper guide pin bolt. DO NOT allow the open end wrench to come in contact with the brake caliper. Allowing the open end wrench to come in contact with the brake caliper will cause a pulsation when the brakes are applied.
- Using a backup wrench to hold the brake caliper guide pins stationary, remove the brake caliper guide pin bolts (1).
- Remove the brake caliper.


Note:
Do not reuse the brake hose fitting gaskets.

Note:
- Installation Procedure
-
- Using a brake caliper piston spanner tool, rotate the brake caliper piston clockwise while applying pressure to the face of the caliper piston to compress the piston into the caliper bore.
- Position the brake caliper over the brake pads and to the caliper bracket.
- Using a backup wrench to hold the brake caliper guide pins stationary,
install the brake caliper guide pin bolts (1) and tighten to 28 Y (21 lb ft)
.
- Assemble the brake hose fitting bolt (1) and the new brake hose fitting gaskets (2) to the brake hose fitting (3).
- Install the brake hose assembly and tighten the brake hose fitting bolt
to 40 Y (30 lb ft)
.
- Install the parking brake cable (1) to the parking brake cable bracket and the actuator lever.
- Install the parking brake cable retaining clip (1) from the parking brake cable bracket.
- Bleed the hydraulic brake system. Refer to Hydraulic Brake System Bleeding.
- Install the tire and wheel assembly. Refer to Tire and Wheel Removal and Installation.
Note:
The brake caliper piston must be fully retracted into the caliper bore before installation.
Note:
Ensure the notches in the caliper piston are properly aligned with the pins on the disc brake pad backing plate.
Caution:
Refer to Fastener Caution.
Note:
Install new brake hose fitting gaskets.
 Rear Brake Caliper Bracket Replacement
Removal Procedure
Warning: Refer to Brake Dust Warning.
Raise and support the vehicle. Refer to Lifting and Jacking the Vehicle.
Remove the tire and wheel assembly. Refer ...
 Rear Brake Hose Replacement (Axle to Caliper)
Removal Procedure
Warning: Refer to Brake Dust Warning.
Warning: Refer to Brake Fluid Irritant Warning.
Raise and support the vehicle. Refer to Lifting and Jacking the ...
Other materials:
Menu System
Controls
The Push/MENU/TUNE knob, Push/ MENU/TUNE button, and / BACK button are used to
navigate the menu system.
Push/MENU/TUNE Knob:
Turn to:
Enter the menu system.
Highlight a menu option.
Select a value.
Push/MENU/TUNE Button:
Press to:
Select or activate the highlighted men ...
Headlamp Aiming
Visual Aiming Preparation Procedure
Note: Some state and local laws specify requirements for headlamp
aim. Comply with all of these laws when performing any headlamp aiming operations.
Headlamp aim should be checked:
When a new headlamp capsule is installed.
If ser ...
Torque Converter Housing with Fluid Pump Assembly Installation (6T40/45/50 Non
Hybrid)
Torque Converter Housing with Fluid Pump Assembly Installation
Callout
Component Name
1
Fluid Pump Seal Assembly
2
Torque Converter Housing Gasket
3
Torque Converte ...

0.0054