Chevrolet Sonic Repair Manual: Drive Belt Replacement
Special Tools
- EN-48488 Holding Wrench
- EN-955 Locking Pin
For equivalent regional tools, refer to Special Tools.
- Removal Procedure
-
- Remove the right front wheelhouse liner extension. Refer to Front Wheelhouse Liner Inner Front Extension Replacement.
- Install the engine support fixture. Refer to Engine Support Fixture.
- Remove the engine mount bracket. Refer to Engine Mount Bracket Replacement - Right Side.
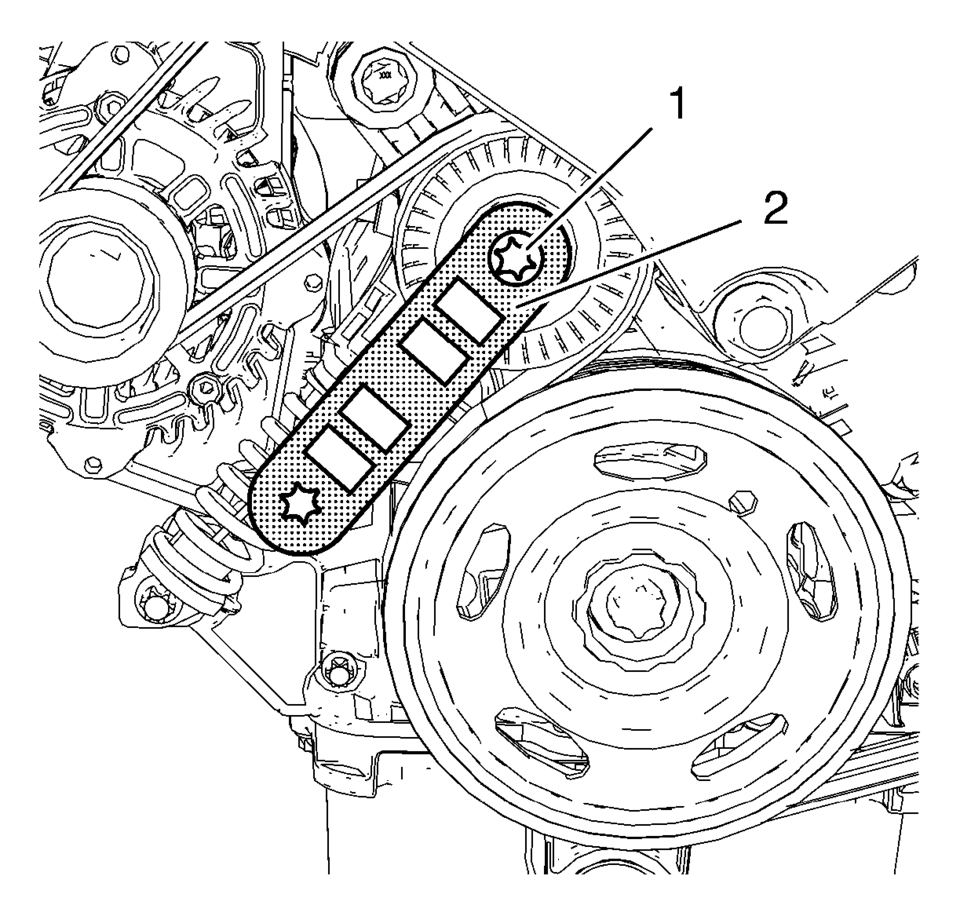
- Install EN-48488 holding wrench (2) to the drive belt tensioner (1).
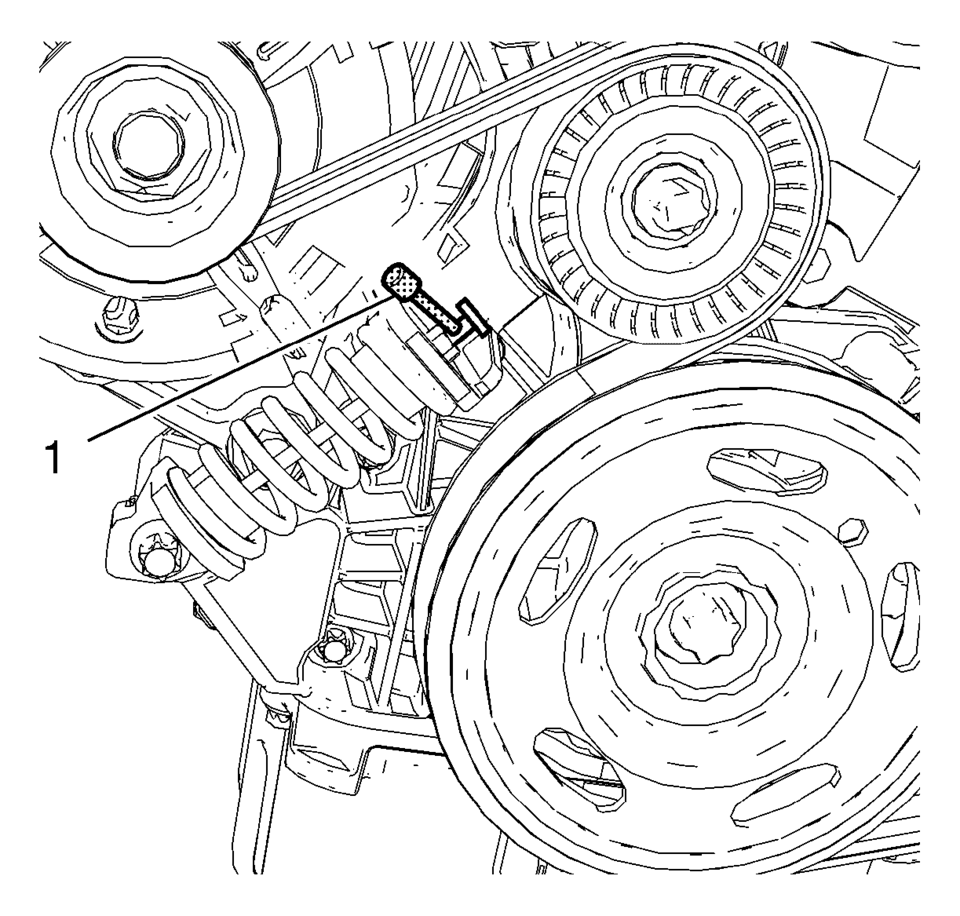
- Move the drive belt tensioner clockwise until the drive belt tensioner can be fixed with EN-955 locking pin (1).
- Remove the EN-48488 holding wrench .
- Remove the drive belt (1).


- Installation Procedure
-
- Install the drive belt (1).
- Install the EN-48488 holding wrench (2) to the drive belt tensioner (1).
- Move the drive belt tensioner clockwise until EN-955 locking pin (1) can be removed.
- Allow the tensioner to slide back slowly.
- Remove the EN-48488 holding wrench .
- Install the engine mount bracket. Refer to Engine Mount Bracket Replacement - Right Side.
- Install the right front wheelhouse liner extension. Refer to Front Wheelhouse Liner Inner Front Extension Replacement.
- Remove the engine support fixture. Refer to Engine Support Fixture.


 Drive Belt Removal
Special Tools
EN-955 Locking Pins
EN-48488 Holding Wrench
For equivalent regional tools, refer to Special Tools.
Install EN-48488 wrench (1) to the drive belt tensioner.
...
 Power Steering Pump Belt Installation
Special Tools
EN-50098 Belt Installer
For equivalent regional tools, refer to Special Tools.
Install EN-50098 installer (2) and a NEW power steering pump belt (1)
to wat ...
Other materials:
Parking Brake
To set the parking brake, hold the brake pedal down and pull up on the parking
brake lever. If the ignition is on, the brake system warning light will come on.
See Brake System Warning Light.
To release the parking brake, hold the brake pedal down. Pull the parking brake
lever up until you ...
System Operation
The vehicle has a Traction Control System (TCS) and StabiliTrak®, an electronic
stability control system. These systems help limit wheel slip and assist the driver
in maintaining control, especially on slippery road conditions.
TCS activates if it senses that any of the drive wheels are spinni ...
Front Bumper Impact Bar Replacement
Removal Procedure
Warning: Refer to Approved Equipment for Collision Repair
Warning.
Disable the SIR system. Refer to SIR Disabling and Enabling.
Disconnect the negative battery cable. Refer to Battery Negative Cable
Disconnection and Connection.
Remove all ...
0.0081
