Chevrolet Sonic Repair Manual: Parking Brake Cable Replacement (Disc Brake)
- Removal Procedure
-
- Remove the front floor console. Refer to Front Floor Console Replacement.
- Ensure that the parking brake lever is in the fully released position.
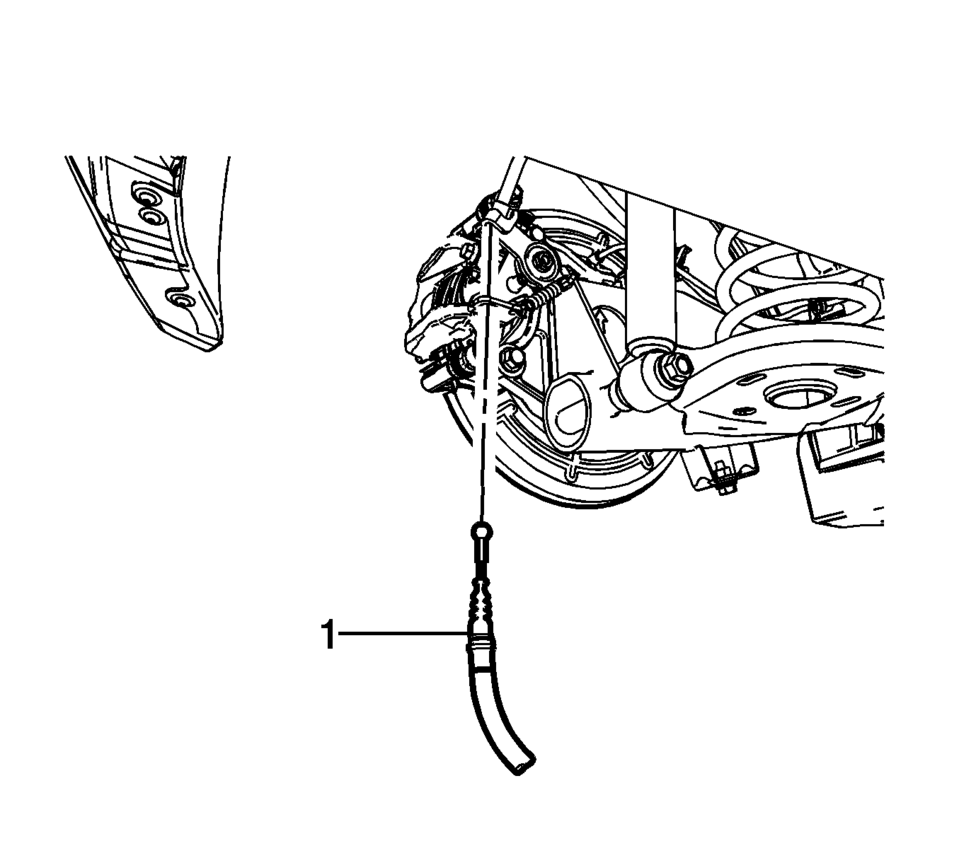
- Using ONLY HAND TOOLS, remove the adjusting nut (1) from the end of the front park brake cable threaded rod.
- Remove the rear seat cushion. Refer to Rear Seat Cushion Removal and Installation.
- Position the rear floor carpet forward to access the parking brake cable pass through grommets.
- Release the parking brake cable pass through grommets (1).
- Release the parking brake cable routing clips (2).
- Release the parking brake cable collars (3) from the floor tunnel bracket.
- Disconnect the park brake lever cable from the equalizer (4).
- Raise and support the vehicle. Refer to Lifting and Jacking the Vehicle.
- Remove the left front parking brake cable bracket bolt (1).
- Remove the left rear parking brake cable bracket bolt (1).
- Remove the left parking brake cable retaining clip (1) from the parking brake cable bracket.
- Disconnect the left parking brake cable (1) from the actuator lever and remove the left parking brake cable from the cable bracket.
- Remove the fuel tank aero shield nuts (1) and the shield.
- Remove the right front parking brake cable bracket bolt (1).
- Remove the right rear parking brake cable bracket bolt (1).
- Remove the right parking brake cable retaining clip (1) from the parking brake cable bracket.
- Disconnect the right parking brake cable (1) from the actuator lever and remove the right parking brake cable from the cable bracket.
- Feed the parking brake cable through the vehicle body.
- Lower the vehicle and remove the parking brake cable and equalizer assembly from inside the vehicle.


- Installation Procedure
-
- Install the parking brake cable pass through grommets (1).
- Install the parking brake cable routing clips (2).
- Install the parking brake cable collars (3) to the floor tunnel bracket.
- Connect the park brake lever cable to the park brake cable equalizer (4).
- Reposition the rear floor carpet.
- Install the rear seat cushion. Refer to Rear Seat Cushion Removal and Installation.
- Raise and support the vehicle. Refer to Lifting and Jacking the Vehicle.
- Install the right parking brake cable to the cable bracket and connect the right parking brake cable (1) to the actuator lever.
- Install the right parking brake cable retaining clip (1) to the parking brake cable bracket.
- Install the right rear parking brake cable bracket bolt (1) and tighten
to 22 Y (16 lb ft)
.
- Install the right front parking brake cable bracket bolt (1) and tighten
to 22 Y (16 lb ft)
.
- Install the fuel tank aero shield and the nuts (1).
- Install the left parking brake cable to the cable bracket and connect the left parking brake cable (1) to the actuator lever.
- Install the left parking brake cable retaining clip (1) to the parking brake cable bracket.
- Install the left rear parking brake cable bracket bolt (1) and tighten
to 22 Y (16 lb ft)
.
- Install the left front parking brake cable bracket bolt (1) and tighten
to 22 Y (16 lb ft)
.
- Lower the vehicle.
- Using ONLY HAND TOOLS, loosely install the adjusting nut (1) to the front park brake cable threaded rod.
- Adjust the parking brake. Refer to Parking Brake Adjustment.
- Install the front floor console. Refer to Front Floor Console Replacement.
Caution:
Refer to Fastener Caution.
 Parking Brake Adjustment (Disc Brake)
Note: The park brake cable adjusting nut is a nylon lock type. Use
ONLY HAND TOOLS whenever tightening or loosening the adjusting nut.
Apply and fully release the park brake several times ...
 Rear Brake Hose Replacement (Body to Axle - Disc Brake)
Removal Procedure
Warning: Refer to Brake Dust Warning.
Warning: Refer to Brake Fluid Irritant Warning.
Raise and support the vehicle. Refer to Lifting and Jacking the ...
Other materials:
Exterior Lamp Controls
The exterior lamp control is on the instrument panel to the outboard side of
the steering column.
There are four positions:
(Off): Briefly turn to this position
to turn the automatic light control off or on again.
AUTO (Automatic): Turns the headlamps on automatically at normal brightness, ...
Wheel Alignment and Tire Balance
The tires and wheels were aligned and balanced at the factory to provide the
longest tire life and best overall performance. Adjustments to wheel alignment and
tire balancing are not necessary on a regular basis. Consider an alignment check
if there is unusual tire wear or the vehicle is signi ...
OnStar Overview
If equipped, this vehicle has a comprehensive, in-vehicle system that can connect
to a live Advisor for Emergency, Security, Navigation, Connection, and Diagnostic
Services.
The OnStar system status light is next to the OnStar buttons. If the status light
is:
Solid Green: System is ...

0.0077