Chevrolet Sonic Repair Manual: Air Conditioning Compressor and Condenser Hose Replacement (LUV)
- Removal Procedure
-
- Recover the refrigerant. Refer to Refrigerant Recovery and Recharging.
- Remove the drivetrain and front suspension frame skid plate if equipped. Refer to Drivetrain and Front Suspension Frame Skid Plate Replacement.
- Remove the front fascia assembly. Refer to Front Bumper Fascia Replacement.
- Disconnect the A/C refrigerant pressure sensor electrical connector.
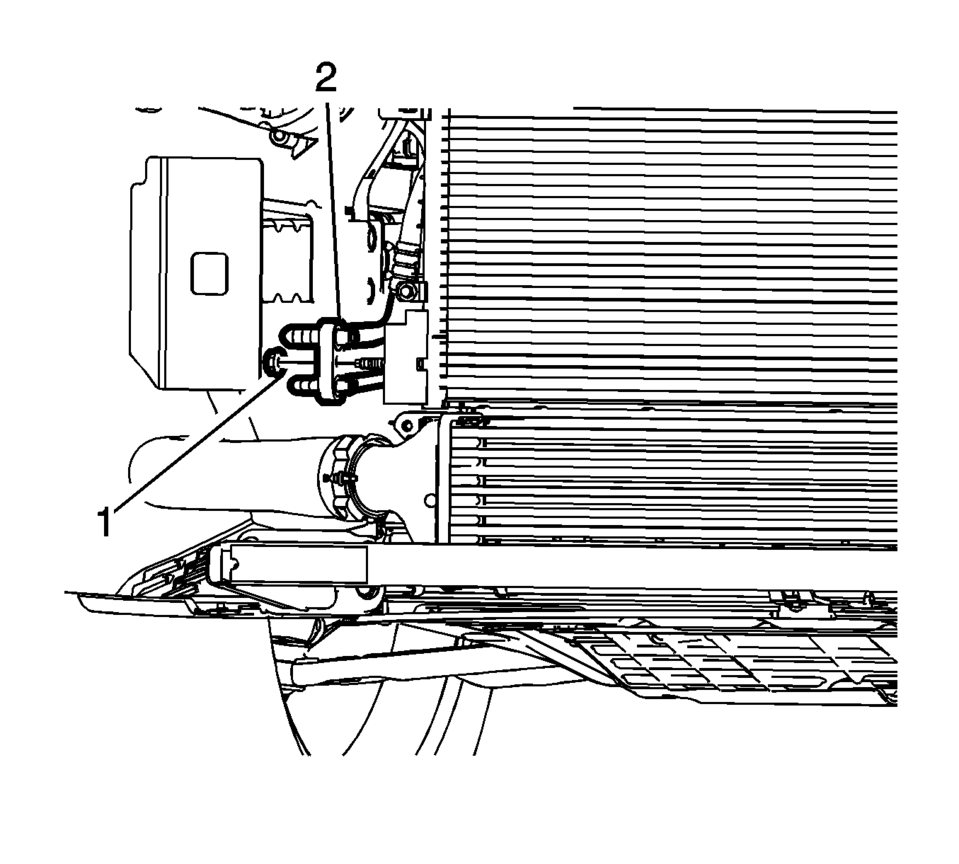
- Remove air conditioning compressor and condenser hose nut (1).
- Remove air conditioning compressor and condenser hose (2) from A/C condenser.
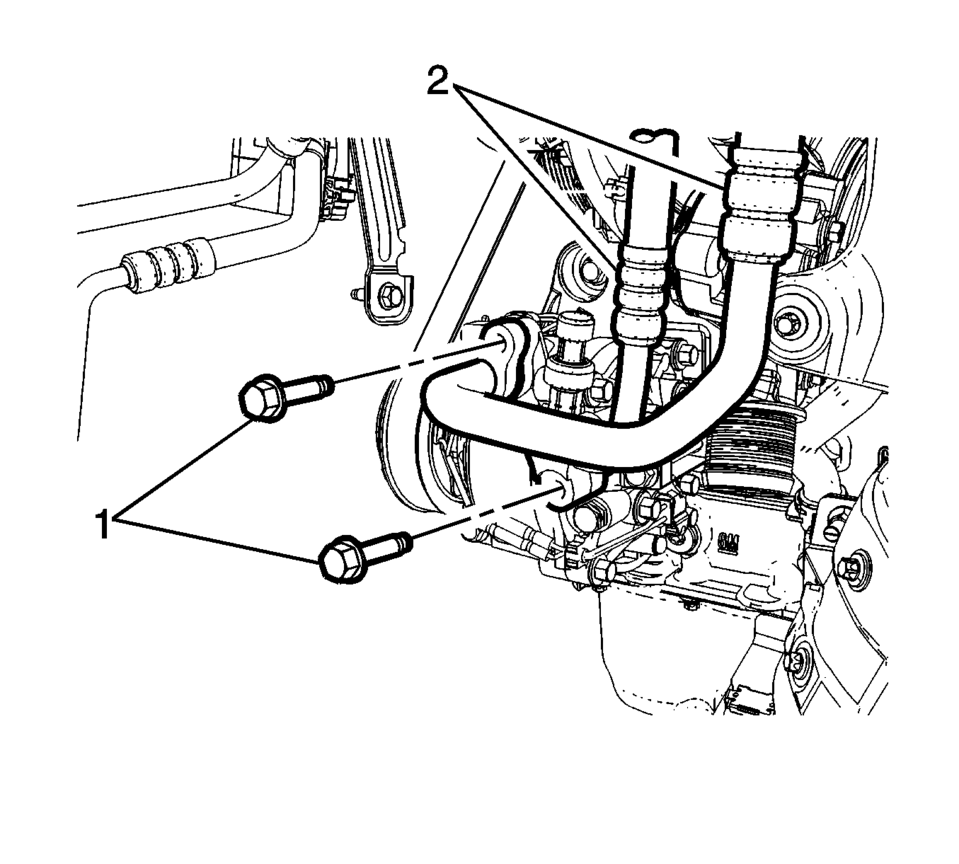
- Remove A/C compressor and condenser hose bolts (1).
- Remove A/C compressor and condenser hose (2) from A/C compressor.
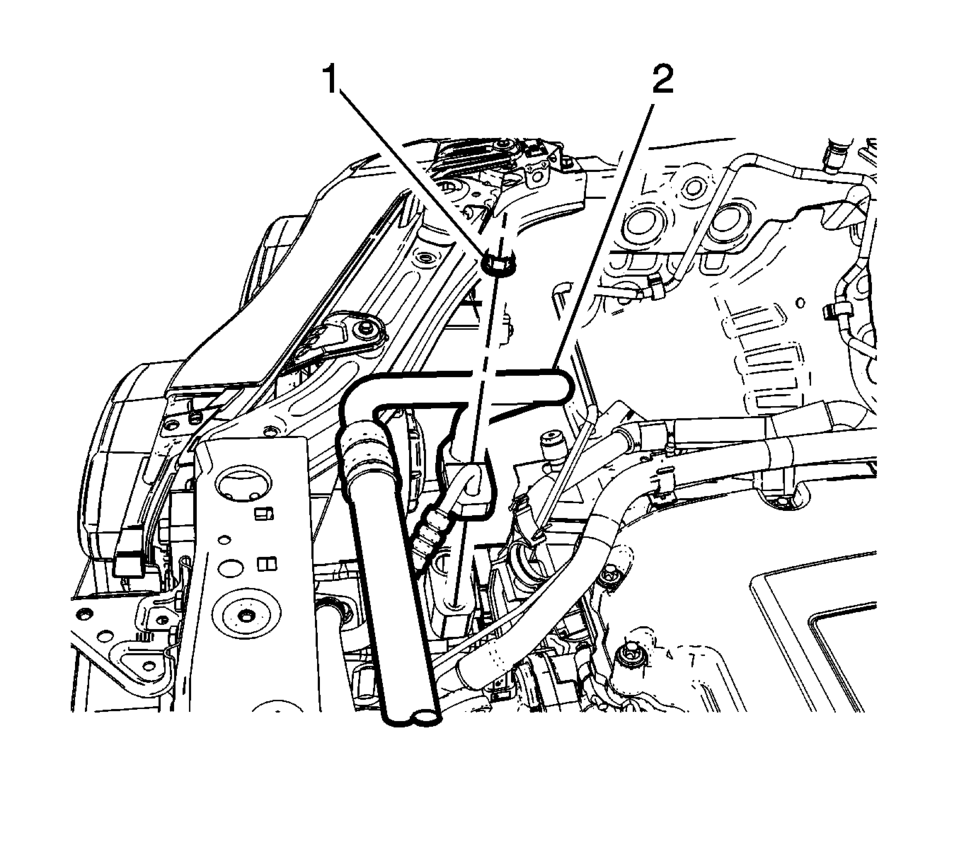
- Remove air conditioning compressor and condenser hose nut (1).
- Remove air conditioning compressor and condenser hose (2) from refrigerant hose.
- Remove air conditioning compressor and condenser hose from the vehicle.
- Discard all the old air conditioning seals.
- Transfer the air conditioning pressure sensor to the new line assembly.
_. i/v
- Installation Procedure
-
- Install NEW air conditioning system seals. Refer to Air Conditioning System Seal Replacement.
- Install air conditioning compressor and condenser hose assembly into the vehicle.
- Install air conditioning compressor and condenser hose (2) to the refrigerant hose.
- Install air conditioning compressor and condenser hose nut (1) and tighten
the nut to 22 Y (16 lb ft)
.
- Install air conditioning compressor and condenser hose (2) to the A/C compressor.
- Install air conditioning compressor and condenser hose bolts (1) and
tighten the bolt to 22 Y (16 lb ft)
.
- Install air conditioning compressor and condenser hose (2) to the A/C condenser.
- Install air conditioning compressor and condenser hose nut (1) and tighten
the nut to 22 Y (16 lb ft)
.
- Connect the A/C refrigerant pressure sensor electrical connector.
- Install the front fascia assembly. Refer to Front Bumper Fascia Replacement.
- Install the drivetrain and front suspension frame skid plate if equipped. Refer to Drivetrain and Front Suspension Frame Skid Plate Replacement.
- Charge the refrigerant system. Refer to Refrigerant Recovery and Recharging.
_. i/v
Caution:
Refer to Fastener Caution.
 Air Conditioning Compressor and Condenser Hose Replacement (LDE/LWE)
Removal Procedure
Recover the refrigerant. Refer to Refrigerant Recovery and Recharging.
Disconnect the A/C refrigerant pressure sensor electrical connector.
Remove air ...
 Air Conditioning Compressor and Condenser Hose Replacement (LUW)
Removal Procedure
Recover the refrigerant. Refer to Refrigerant Recovery and Recharging.
Disconnect the A/C refrigerant pressure sensor electrical connector.
Remove ...
Other materials:
Tire Inspection
We recommend that the tires, including the spare tire, if the vehicle has
one, be inspected for signs of wear or damage at least once a month.
Replace the tire if:
The indicators at three or more places around the tire can be seen.
There is cord or fabric showing through the tire's ...
Front Wheel Drive Shaft Seal Replacement - Right Side
Front Wheel Drive Shaft Seal Replacement - Right Side
Callout
Component Name
Preliminary Procedures
Raise and support the vehicle. Refer to Lifting and Jacking the
Vehicle.
Remove the front wheel drive shaft from the tran ...
Front Wheel Drive Shaft Seal Replacement - Right Side
Front Wheel Drive Shaft Seal Replacement - Right Side
Callout
Component Name
Preliminary Procedures
Raise and support the vehicle. Refer to
Lifting and Jacking the Vehicle.
Remove the front wheel drive shaft from the trans ...

0.0066